The Appointment Calendar can be structured to meet the needs of your individual practice. Before building your calendar, consider what appointment types exist in your practice, which resources provide care for patients, and under which resources patients are scheduled to be seen.
Appointment Types
Appointment Types are used to create specific services offered in your practice, to which you may link tasks (Checklist Items), charges (CPTS codes), durations, and color code to your specifications. The Appointment Types will be used to later build the Template system for your calendar.
Navigation
To navigate to set up appointment types
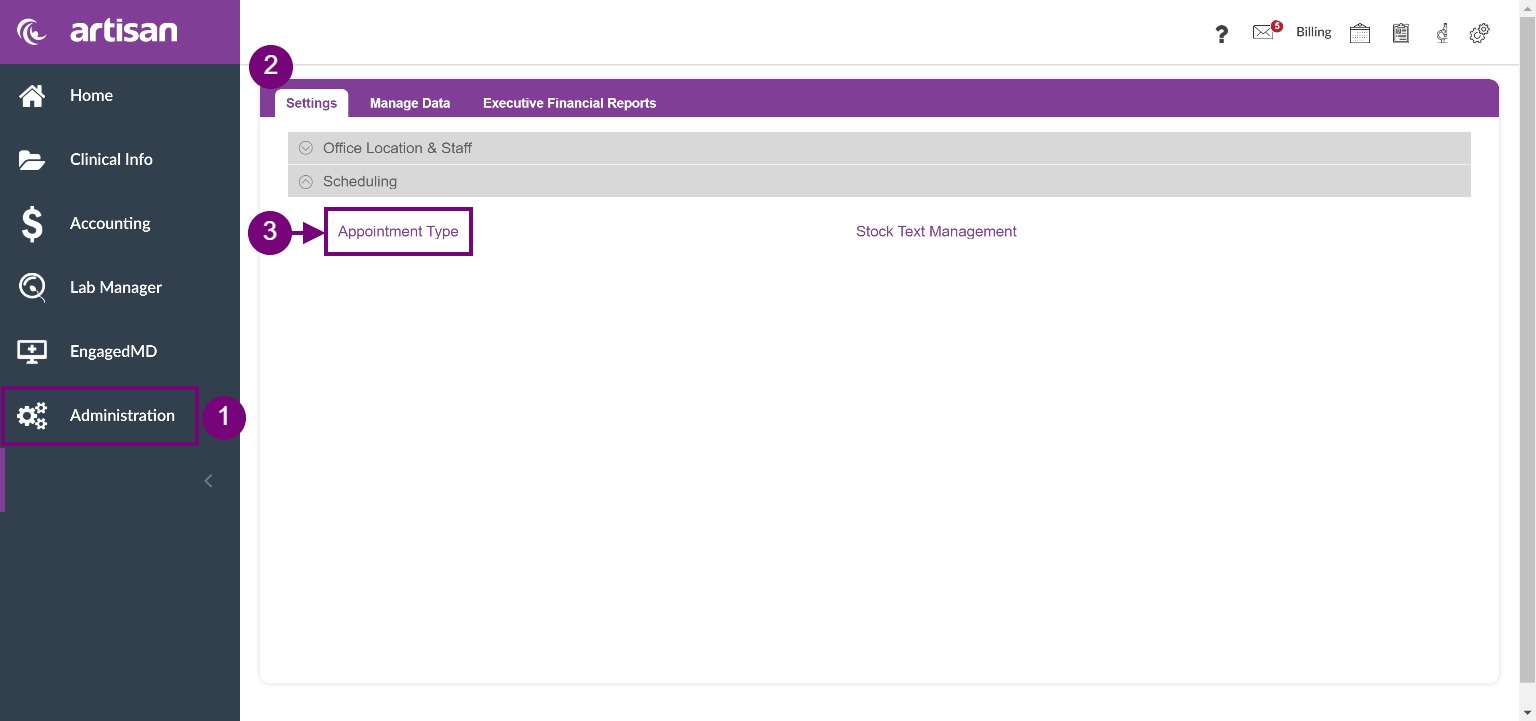
- click the Administration gears icon
- click Scheduling
- select Appointment Type.

To add a new appointment type click + Add New:
To create all of the appointment types in your practice:
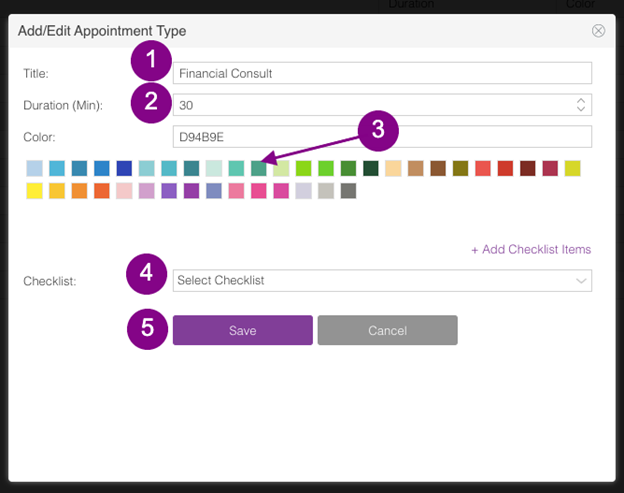
1. Title: Type the Title of the Appointment (ex: New Patient Consult)
2. Duration: Set the duration of the appointment by typing in the number of minutes (ex: 60) or by using the up and down arrows to increase or decrease the length of time.
3. Color: Click on the color that you would like displayed on the calendar when you schedule this type of appointment.
4. Checklist: The Checklist feature allows you to build tasks for the front office to do when a patient is checked in for this appointment type. You may either use the dropdown to use previously created items or click +Add Checklist Items to create new items.
5. Save your work.
Appointment Type Example
In the above example, we have created a Financial Consult appointment. The length of this appointment is one half an hour (30 minutes) and a color has been selected, represented by the code D94BE. We will now add Checklist Items to the Financial Consult appointment type.
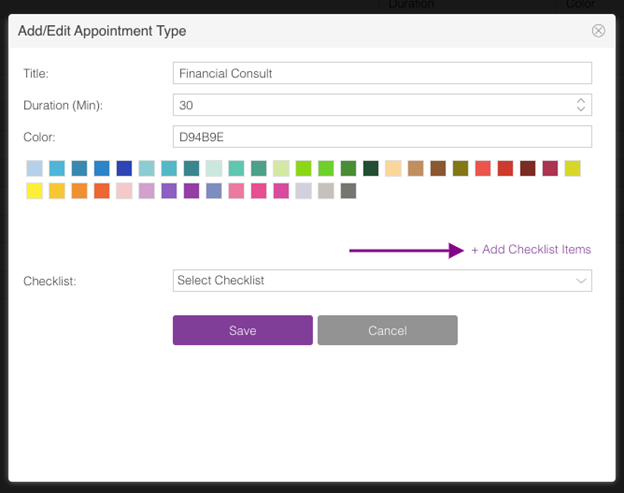
To add Checklist Items to the Financial Consult appointment type, click +Add Checklist Items.
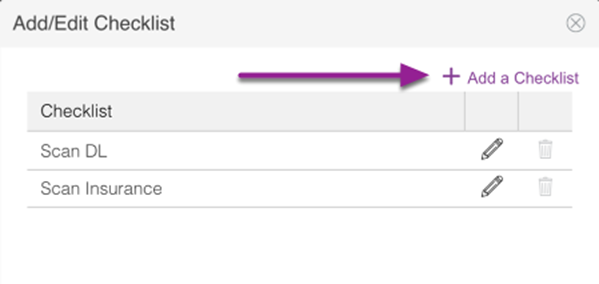
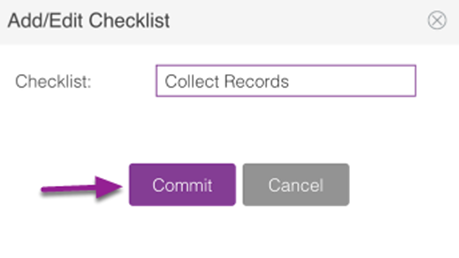
Free type your first item and click Commit to save.
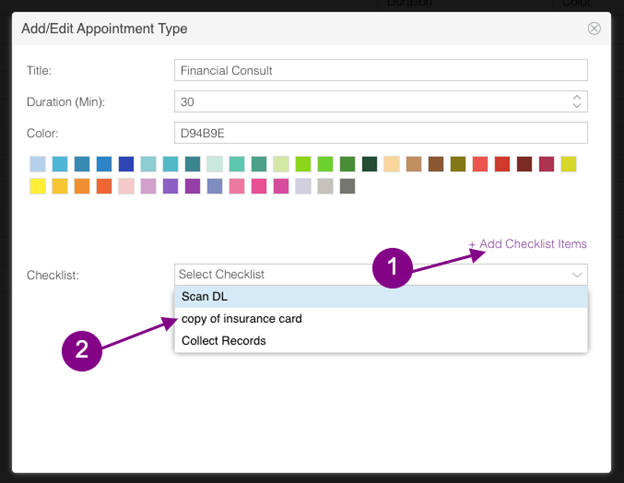
To add a checklist on the appointment type:
1. Click the dropdown in the right-hand corner,
2. Then click on the item or items you wish to add.
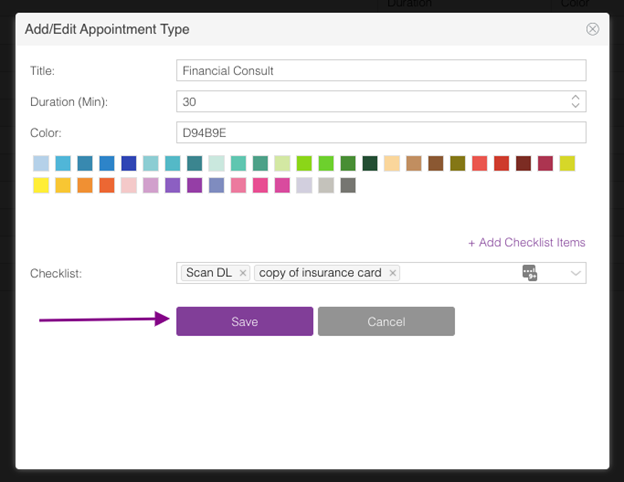
Save the appointment type and its details.

You will build your library of appointment types, specific to your practice. If at any time you need to update or edit these appointments, use the pencil icon to the right of the appointment type, seen in the box above. If at any time you wish to delete an appointment type, click the trash can to the right of the appointment type, seen in the circle above.
Resources
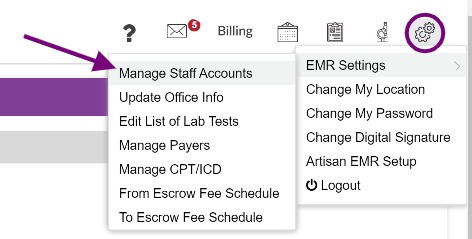
Click the Gears icon and select Manage Staff Accounts to add Resources to your appointments calendar.
To review adding users to the system and the steps to complete click here.
Display Scheduler: User

Display Scheduler: Department

From within the Manage Staff Account, click the Add Department button.

Type in the Department Name, check the display scheduler box then click Save.

The above example showed the Andrology, Embryology, and Monitoring departments have been added as resources. To edit the department, click the pencil icon. Click the trash icon to delete a department resource.
Appointment Templates
Appointment Templates allow the user to create time slots dedicated to specific Appointment Types. This will not only allow for an organized approach to scheduling but will also enable the practice to answer questions and search for the next available appointment times for a given provider or resource and Appointment Type.
Creating Templates in the Library
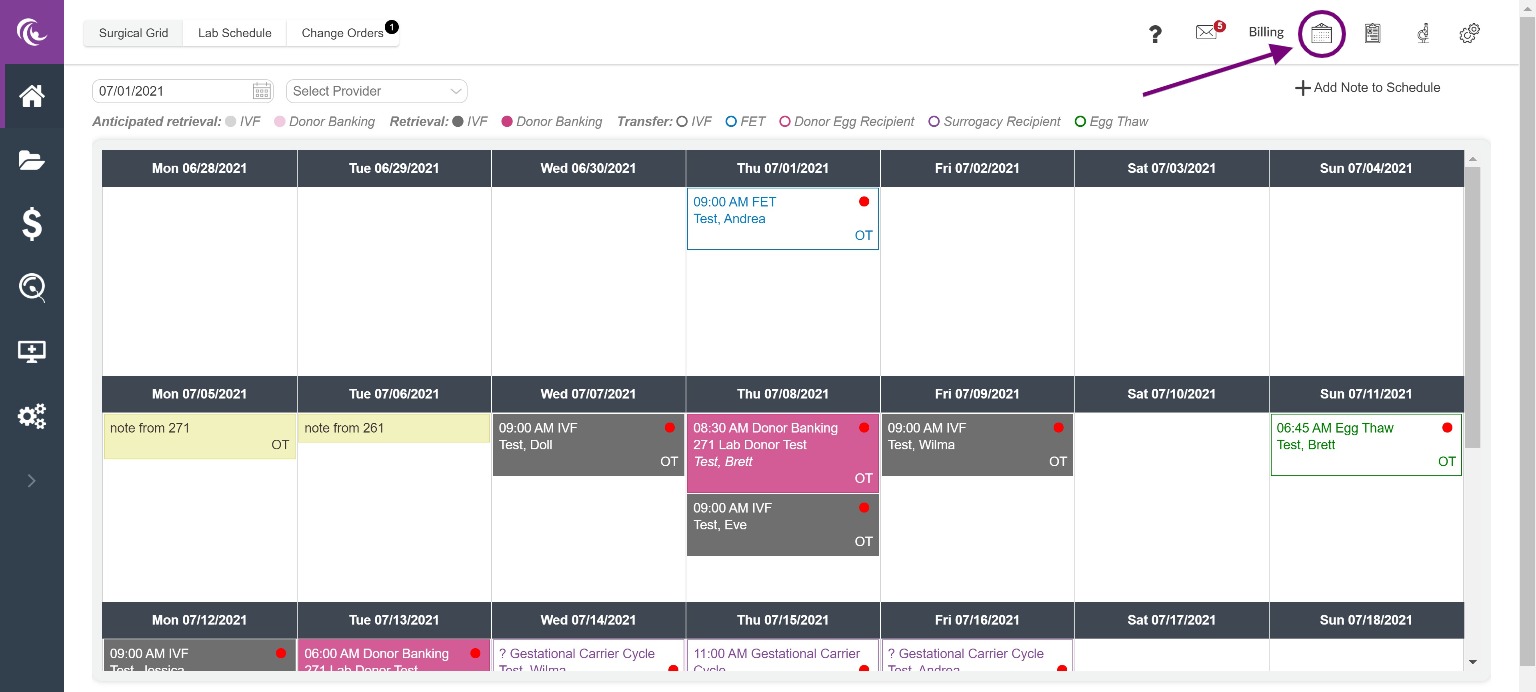
Click the calendar icon.
Assigning Templates to a Resource
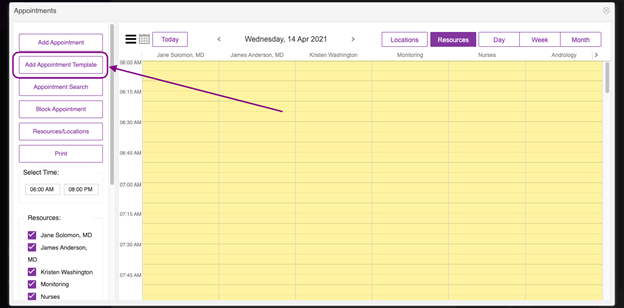
When entering the appointment templates, it will default to the Assign Templates tab.
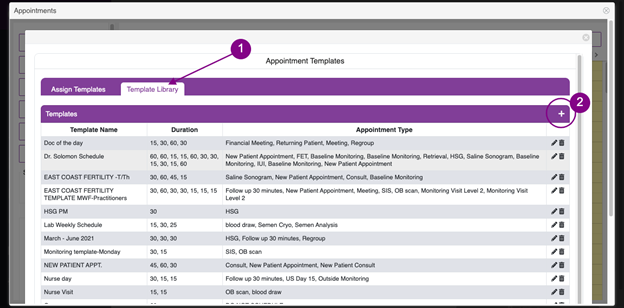
- Click on Template Library to set up the appointment templates.
- Click on the (+) plus sign to create a new template.
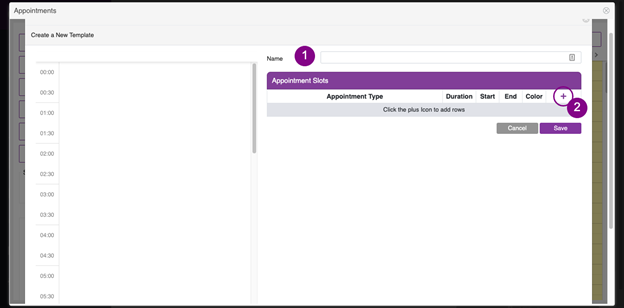
- Enter the name of the template you are creating.
- Click on the (+) plus sign to enter a block of time.
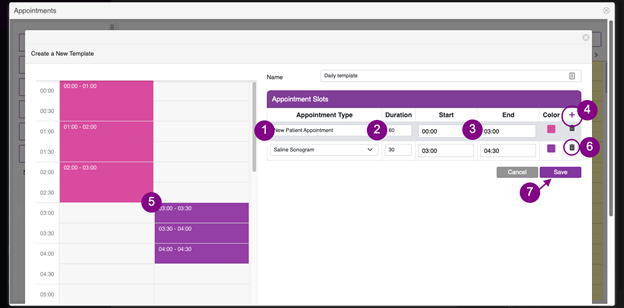
- Appointment Type: Begin by selecting the Appointment Type from the drop-down menu.
- Duration: will auto-populate based upon the chosen Appointment Type.
- Start/End: These are your templating blocks of time that start at 0:00. Enter how long this appointment block will last on the schedule. For this example, we blocked a New Patient Appointment for first 3 hours of the block followed by 1.5 hours of Saline Sonogram appointments. Make sure the first appointment on the template starts at 0:00. **It is important to note 0:00 is the start, not an actual time. For example, 6:00 to 8:00 falls on the 6th hour of this block of time. If you place this on a resource’s schedule, this would be the last 2 hours of that resource’s schedule
- Click on the (+) plus sign to add a new appointment template.
- The blocked appointments will reflect on the template to the left.
- Click the trash can icon to delete a line item.
- Enter as many appointment types as you desire for that particular template. Click Save to save the template.
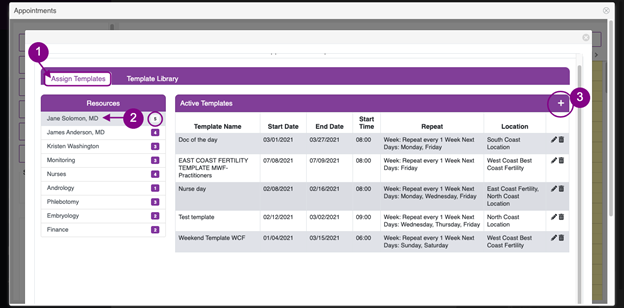
- Click on Assign Templates to assign a specific template to a resource.
- Select the resource from the Resource list. The number next to the resource name indicates how many templates are assigned to that individual/department.
- Click on the (+) plus sign to assign a template.
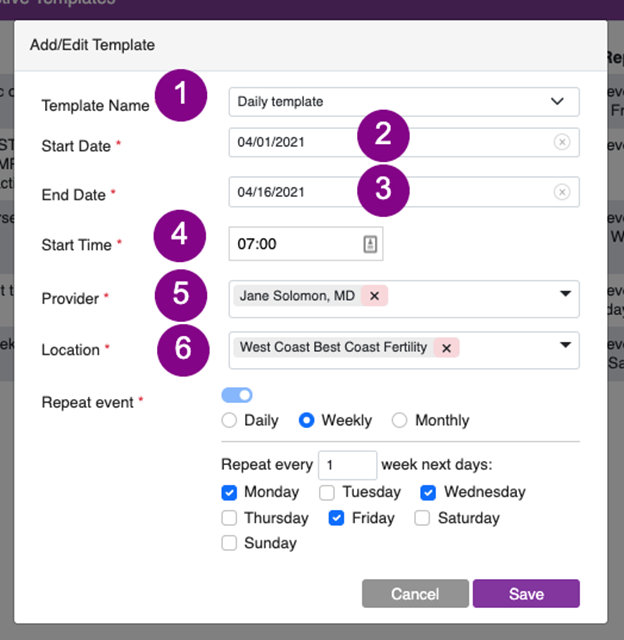
- Begin by selecting the Template Name from the drop-down menu.
- Start Date: Select the Start Date for where you want your template to appear.
- End Date: Select the End Date for the date you want this template to end.
- Start Time: this is when you want the template to start on the calendar. For this example, we are starting the templates at 7:00 A.M. **Times are in military time.
- Provider: Select the resource(s) where you want this template to appear. This is a multi-select field, so you can select several resources at one time to assign to this template.
- Location: Select the location(s) where you want this template to appear. This is a multi-select field, so you can select several locations at one time to assign to this template.
In the above example, we are creating a Daily Template. The start date of the template is April 1, 2021, for provider, Jane Solomon, MD with templates beginning at 7:00 A.M.
Repeat Event
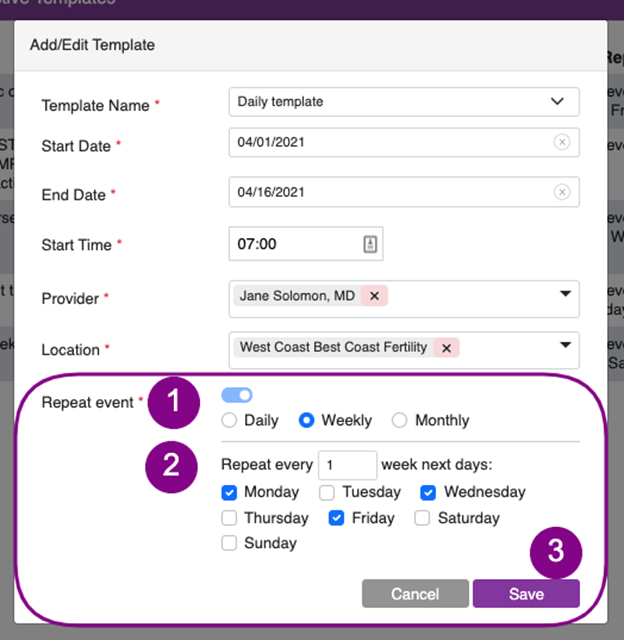
1. When creating a repeating template, as most will be, select the frequency with which it will repeat. If it is a daily event, select Daily (but remember this will indicate availability 7 days a week). Use Monthly and Yearly repeat options as applicable.
2. Most frequently, Weekly will be used, which allows the user to dictate the specific days of the week for the template.
3. Click Save to add the template to the calendar.
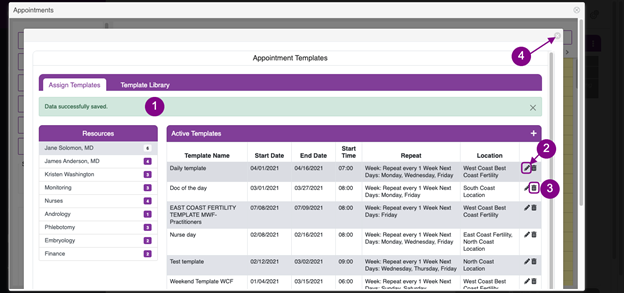
- After saving the assigned template, a green banner will appear notifying you that the data was saved successfully.
- To edit an assigned template, click on the pencil icon to make any necessary changes.
- To delete an assigned template, click on the trash can icon.
- Once finished assigning templates, close out the window by clicking the “x”.
Template Appearance
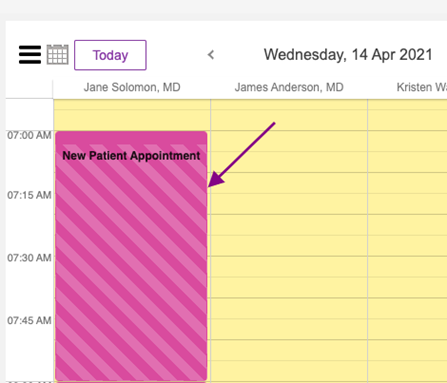
Templated slots will appear as above with the Appointment Type and color assigned to the appointment type. The diagonal lines indicate this is a template.
**Templates are only viewable under the Resource or Resource by Location views of the calendar.
Click the templated slot that you wish to manage.

The above dialog box will appear:
- Delete Series: click this button if you wish to delete all the templates in this series in this time slot that have been created.
- Edit This slot: click this button to delete a template on a specific date and time.
- Convert to Appointment: click this tab to create an appointment. See How to Use the Appointment Calendar manual to learn more.

The above window will pop-up once the Delete Series button has been selected. Click Yes to proceed and No to cancel.
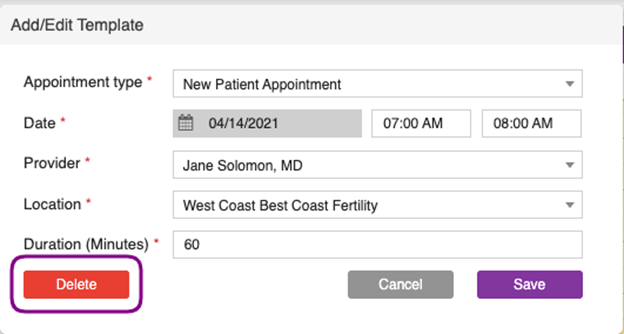
Editing the slot will open up the Add/Edit Template window. Click the Delete button if you wish to proceed.
Resources/Locations
The Resources/Locations allow the user to customize their appointments calendar view.
This is user-specific meaning that all users will have to set up their own resources/locations view as it applies to their workflow.

From within the appointments calendar, click the Resources/Locations button.
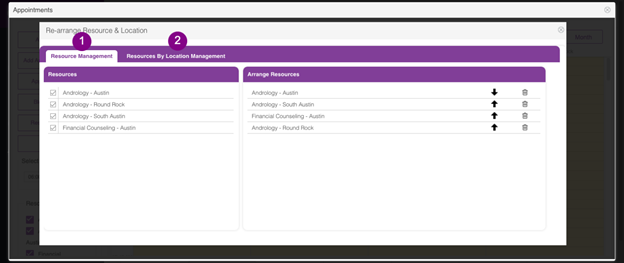
There are 2 sections within the Resource & Location window.
1. Resource Management - allows a user to add and customize the resources view within the appointments calendar.
2. Resource by Location Management - allows a user to manage locations that they want to view on the appointments calendar.
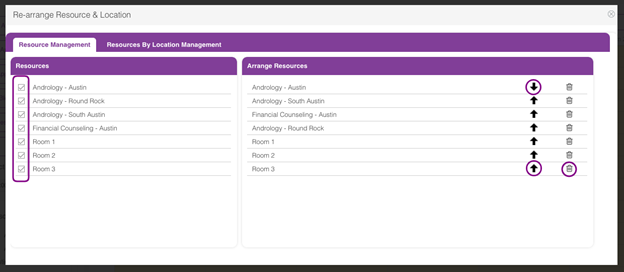
Select the Resources that you wish to add and will be tracking on a day to day basis by checking the box right next to the name of the resource.
Once selected, the Resource will populate to the right-hand corner of the screen.
Click the arrow icon to move a resource up and down from the list. Arranging the resources list from top to bottom will show up on the appointments calendar resource view from left to right.
Clicking the trash can icon will permanently delete the resource on your list.
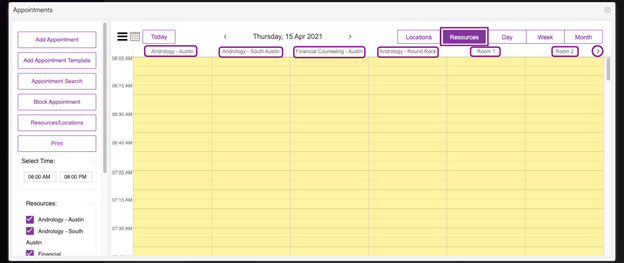
The above screenshot is an example of a customized resource view. Click the arrow icon to view the next page if you have more than six resources selected.
From within the Resources by Location Management tab, select the location of the clinic that applies to your workflow by clicking the appropriate location box.
.
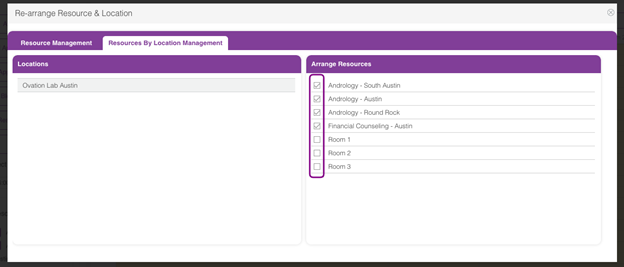
Click the checkbox icon to add the resources to your calendar.
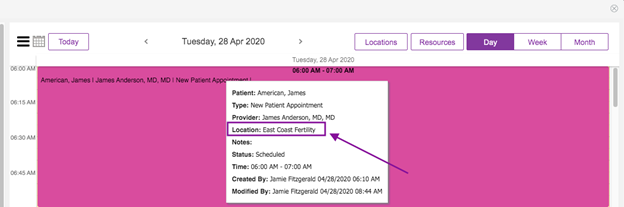
This is an example of the Day view where you will be able to see scheduled appointments for both locations.
In this example, West Coast Best Coast Fertility location is selected and the resources selected are the following: James Anderson, MD, Monitoring, Financial Counseling, Embryology, Jane Solomon, MD.
The Resources By location Management tab allows a user to select specific resources to be managed for each different location. Click the location then select the resources that you wish to appear on your appointments calendar.

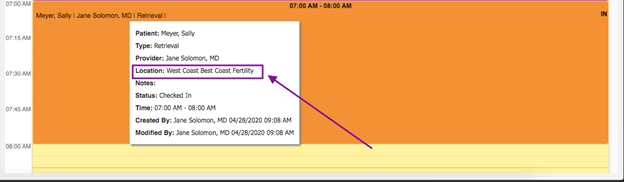
In this example, West Coast Best Coast Fertility location has been selected from the Appointments panel on the left-hand corner of the screen.
From within the Locations view, you will be able to toggle back and forth to different locations and view the resources selected to be managed.
**All manuals are compliant with HIPPA regulations. No patient information has been released. All screenshots above were taken from a test clinic with fake patient information.
Heather Yatsko
Comments