Artisan's support staff will create the initial user account when you join the Artisan family. Follow these instructions to create additional staff accounts.
Note: Staff accounts may ONLY be created or managed by individuals with Clinic Administrator or Practitioner system privileges.
Navigation
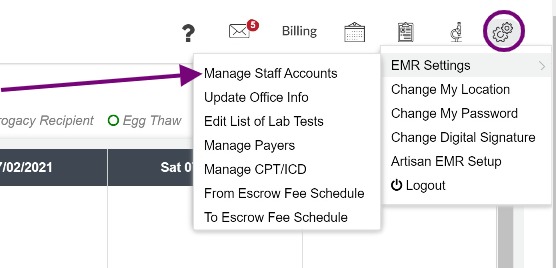
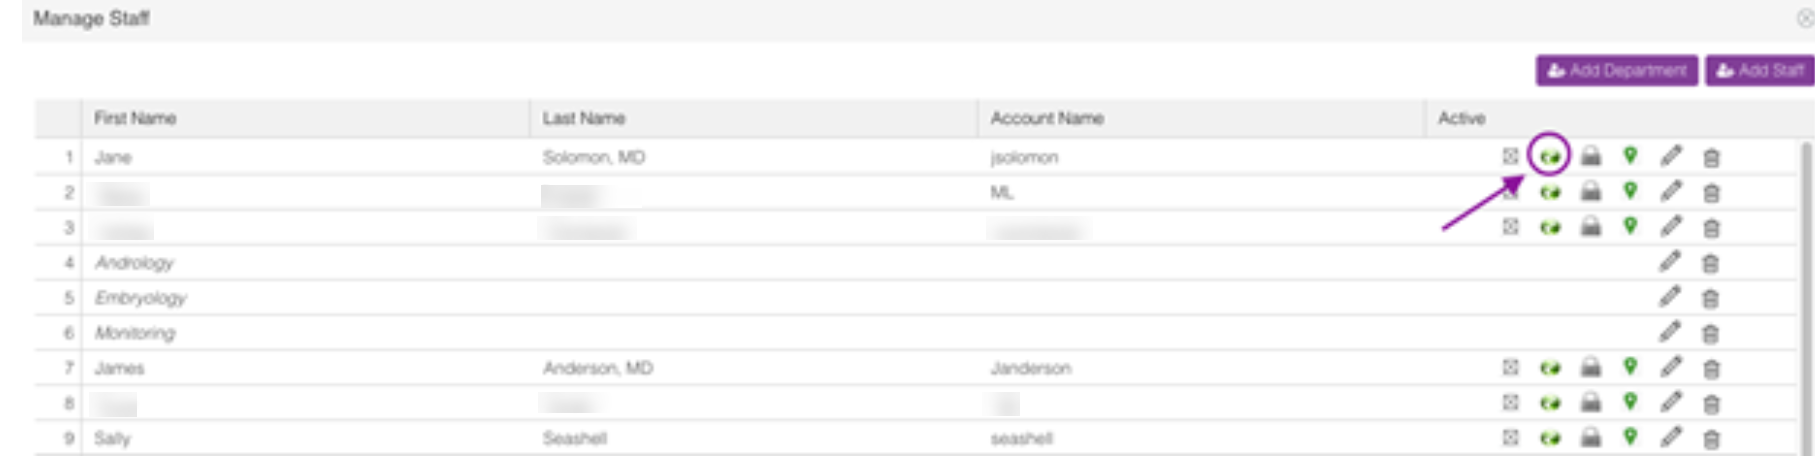
Go to the Gear icon in the upper right corner. Use the pulldown menu to select EMR Settings. Choose Manage Staff Accounts.
Add A New Staff Member

Click the Add Staff button to create a new Artisan user.
(You may use the Add Department button to create a new Resource on the appointment calendar if that resource is not a user; for example: "Monitoring Room" may be a scheduling resource but will not be a user of the system).
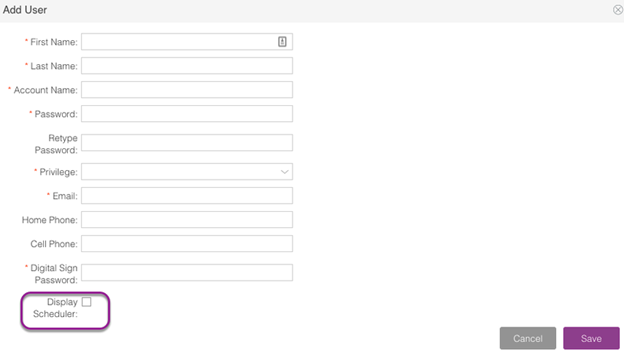
Fill in all of the fields to create a new Artisan Account. If this user also needs to be listed on the appointment calendar as a resource, then select the Display Scheduler box.
Each staff member will have three items created with their account: a username, a password, and a digital signature.
Please note that each user name is unique throughout Artisan. If there is a previous user named Joe Smith in any Artisan clinic, the next individual with that name will need to select a different user name (e.g., “J Smith” or “JoeSmith” or a nickname “Smitty”).
Then click Save.
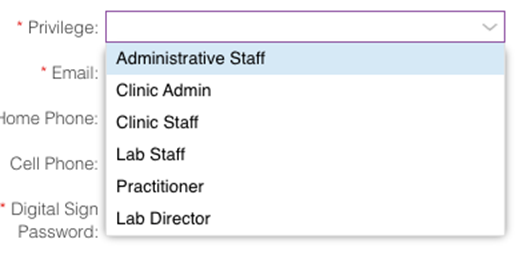
There are 6 user sets inside of Artisan:
Administrative Staff: usually used for Front office and billing team members
Clinic Admin: user set for Practice Administrator or Practice Manager
Clinic Staff: Nursing/MA user set
Lab Staff: Andrology/Embryology user set
Practitioner: NP/PA/physician. (This will be used only for billing purposes)
Lab Director: Lab Director user set
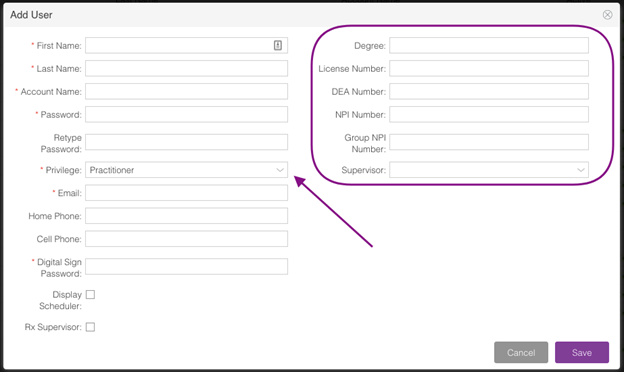
If the Practitioner Privilege is picked then other fields will also populate to be filled in.
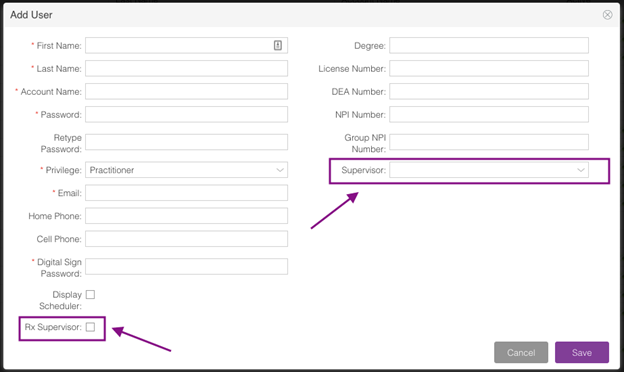
Select the Rx Supervisor box and click the dropdown icon in the Supervisor field to add a supervising physician for a Nurse Practitioner or Physician Assistant that works under an MD.
This will allow the NP or PA to send prescriptions and drop the Supervising Physician's name on their claims. Then click Save.
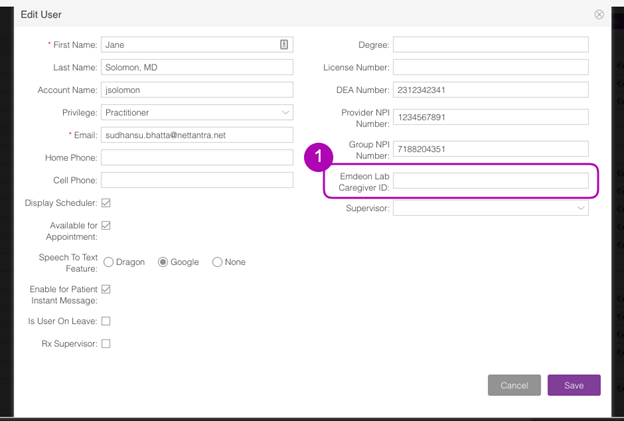
In this example, we are creating a practitioner account.
Fill out the required fields and select the following options if it applies to the user:
1. Emdeon Lab Caregiver ID: This information comes from the lab integration with Change Healthcare and will be entered by an Artisan Representative.
*User names are created by the Clinic Administrator at the time of account creation and may not be changed. User names are not case sensitive. User names are for sign-in purposes only and are not displayed anywhere in Artisan.
Manage Staff Accounts and Passwords
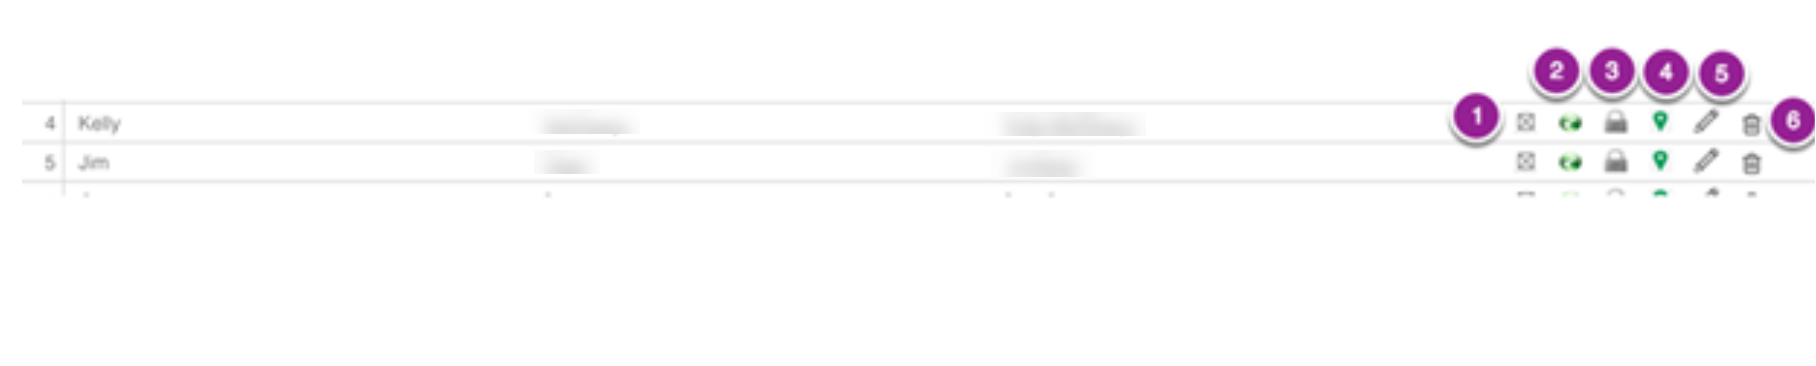
- Active/Inactive status - click the check box to inactivate an account.
- Change Password - see next step for details.
- Change Digital Signature - see next step for details.
- Assign office location - see next step for details.
- Edit Account Information - click to edit a user's name, contact information, and license information.
- Delete User Account- If you delete a user account you will not lose record of their actions in the system.
Change Password
From within the Manage Staff list, click the change password icon.

Enter and retype the New password. The password needs to be at least 8 characters long that includes both lower and uppercase letters, at least one number and a special character. Click Save.
This info window will pop up letting you know that you have successfully changed the password, click Ok.
Change Digital Signature
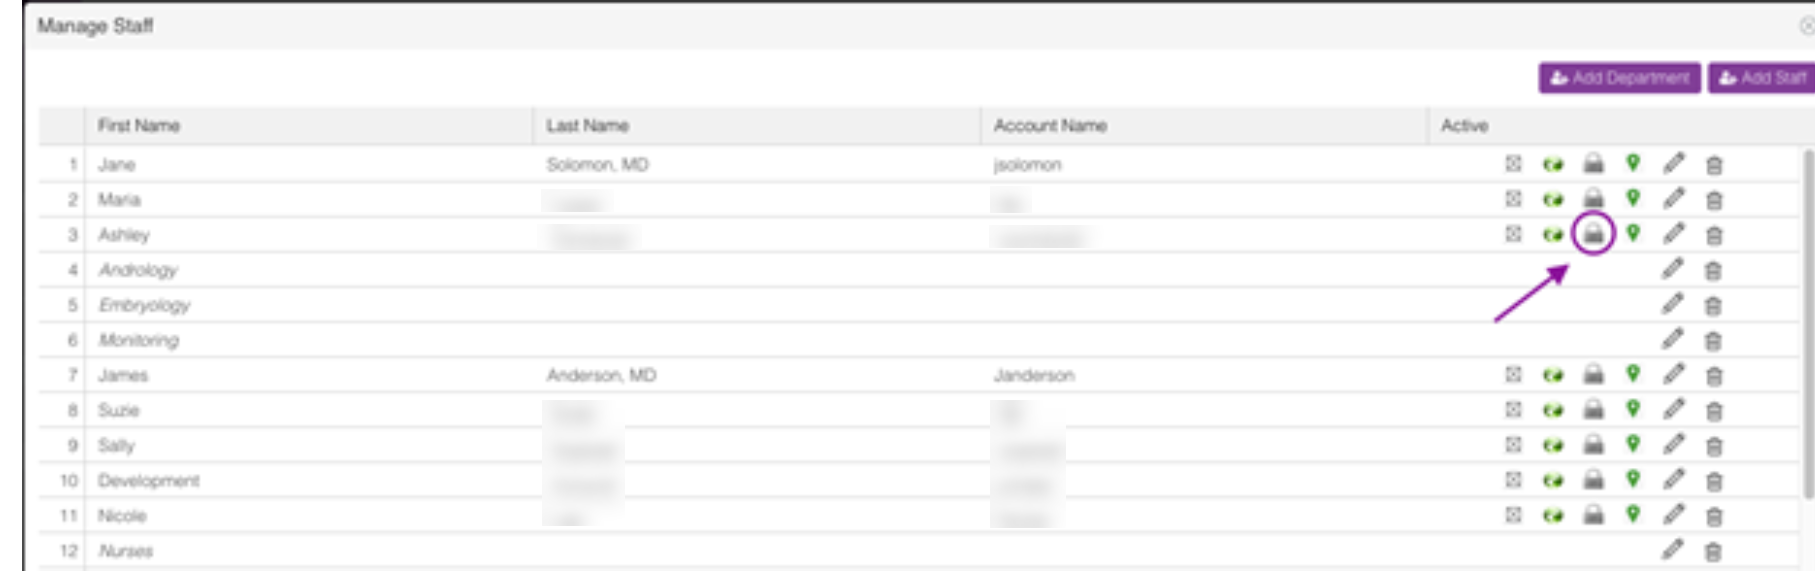
Once the user name has been determined, click the lock icon.
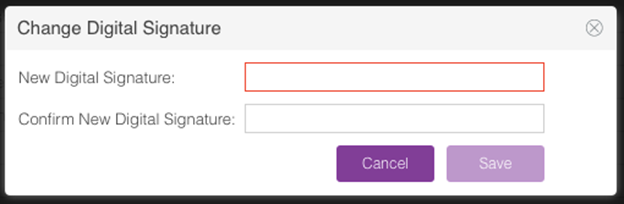
Enter and confirm the new digital signature.
You have now successfully changed the digital signature password. Click OK.
Lab Directors, Clinic Admin, and Practitioners are the only users who can reset a password or digital signature.
Assign Lab Location
If you require access to multiple labs, Artisan separates your patient list by lab location. This has the advantage of both making the list of patients smaller and hence easier to look up as well as making it possible to maintain privacy between the two labs.
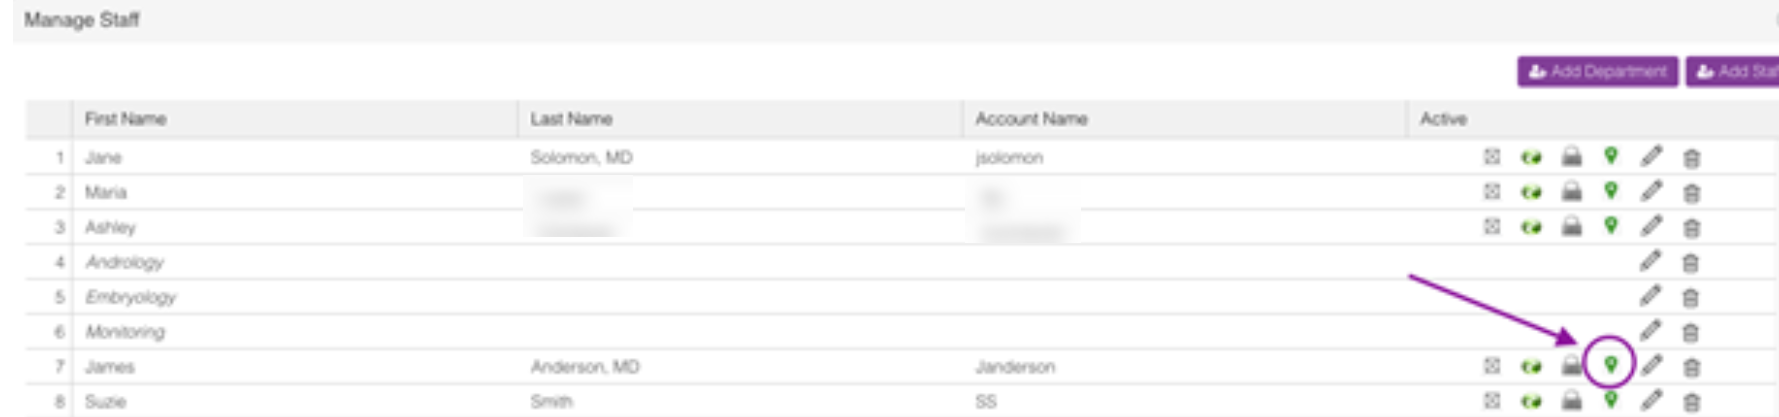
Click the locations icon.
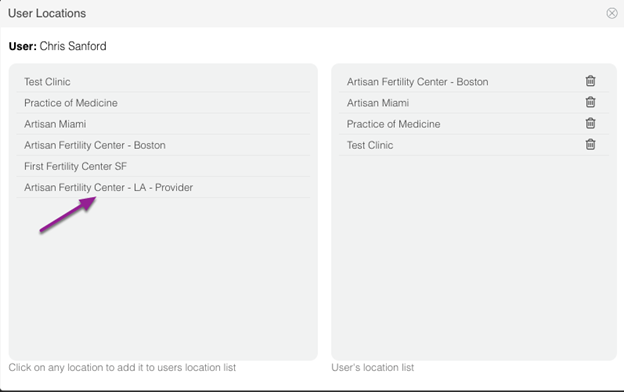
To add a Lab Location to the user's list of Assigned Locations, simply click the Lab in the list on the left side of the portal.
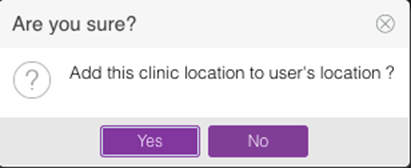
The system will ask if you wish to add the location, click Yes to proceed.
Adding a Department

To add a Department to be a Resource (not a user) click Add Department.
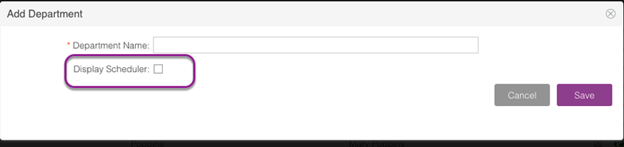
Enter the name of the Department, as you wish for it to appear on the Schedule, check the Display Scheduler box and click Save.
**All manuals are compliant with HIPPA regulations. No patient information has been released. All screenshots above were taken from a test clinic with fake patient information.
Heather Yatsko
Comments