In order to enter semen analysis results into the system, you will need to build andrology templates that capture all the required fields by your practice. The templates are customizable to fit the needs of your practice.
Navigation
-
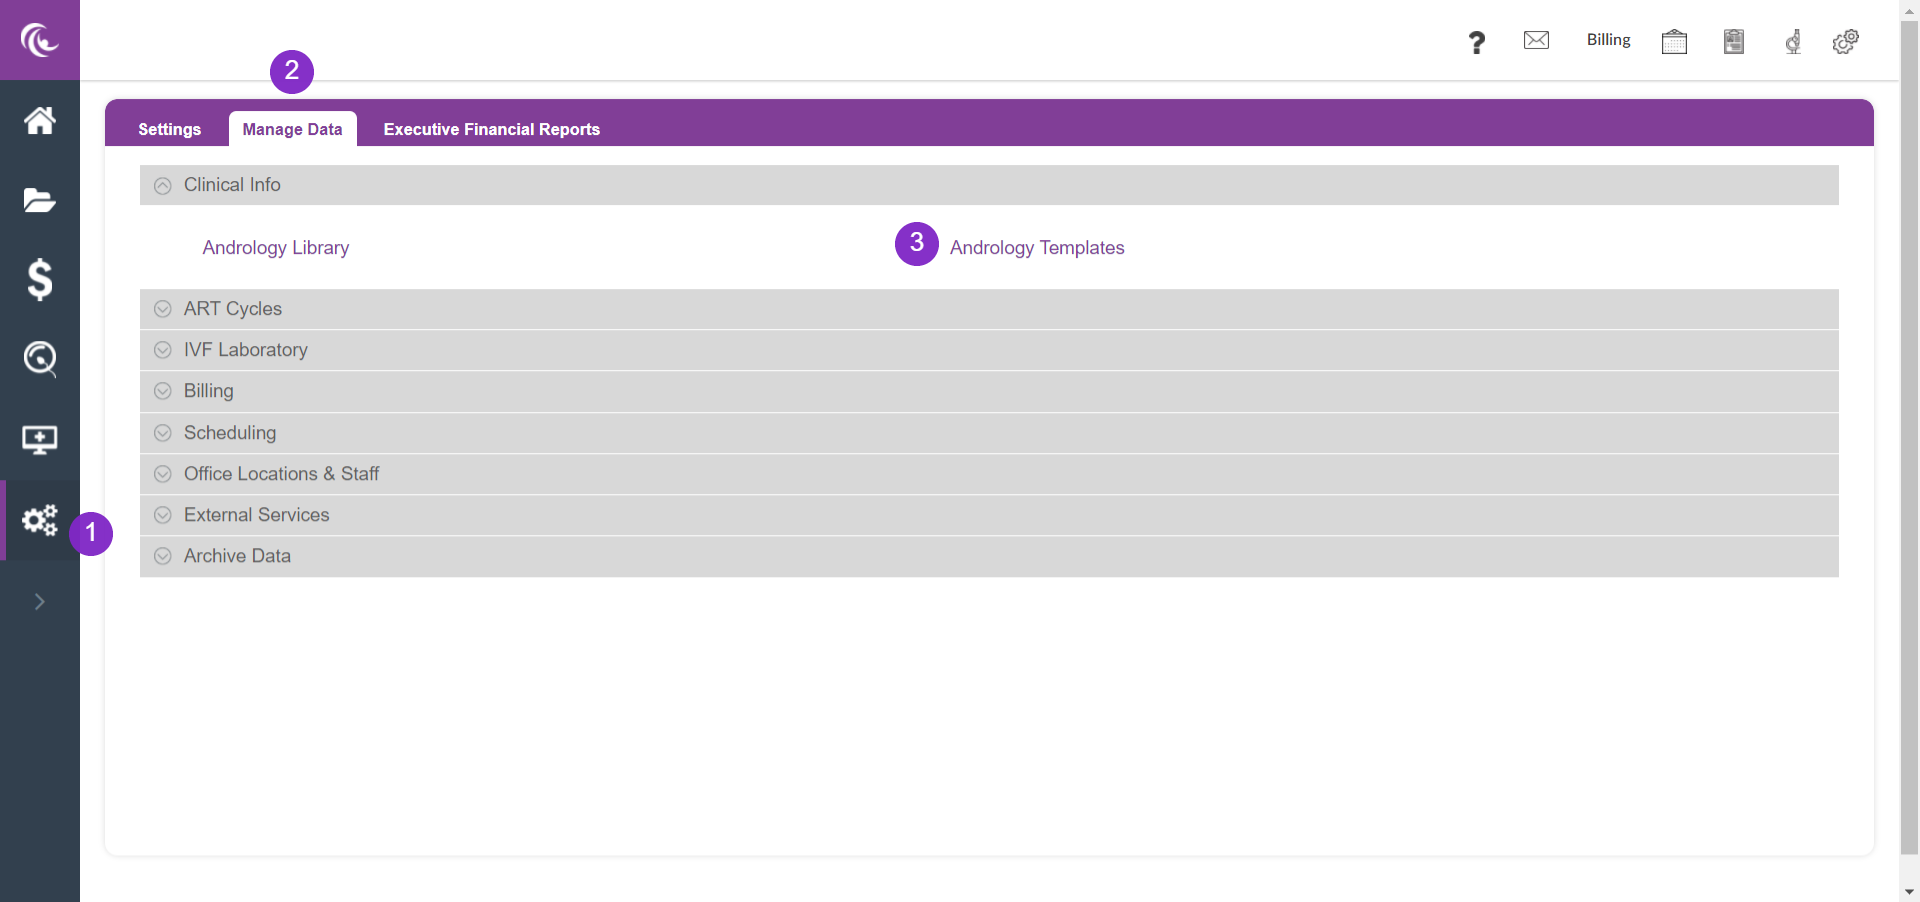
Click on Administration (Gears icon in the control panel to the left).
-
Manage Data tab
-
Select Andrology Templates.
Building Your Templates

To create a new template, select Create A New Template.

Enter the template name and click Ok.

The template name will now display on the left side of the screen. To build items within this template, select the template name that you entered and click Edit this template.

The fields and custom options will be available for you to select. The Template Name will appear in the left-hand corner.
Custom Form Builder Fields

1. Text field- Allows for free text space with the custom title.
2. Select Field- Allows for dropdown.
3. Text Area- Stock text-ability within the free text area.
4. Radio Group- Allows for radio button selection.
5. Date Field- Allows you to enter in an additional date field.
6. Checkboxes Group- Allows for checkbox options.
7. Time Field- Allows for an additional time field.
Available Elements


To add a field to your template select the (+) next to the Title. The field will appear to the left in the template. A green number with the plus sign will show next to the field displaying how many times this field is used in this template.

To delete an item select the trash can icon.

To adjust the size of the field, select the double arrow and select the desired cell percentage.

The item will now show on the template in the selected size.

Here is an example of how fields may be resized to fit on the same line.
Building Custom Elements


Click inside the label field and type the title of the dropdown.

Next, click on the +Add Option button to open up a free text cell. The options will appear as selections in the drop down field.

Click Add to save the option. Repeat one line item at a time to add as many options as desired.

The dropdown options will now be listed below the dropdown title.

Click the pencil icon to edit an option. Click the X icon to delete an option.

Click Ok to save this custom field.

The title of the custom field will display on the drafted template. The purple box to the right in the field indicates this is an editable field. Click on this to open up the fields to edit.
(Please follow these same steps to build Radio Group and Checkbox Group)
Examples of Displays in a Live Template

This is how the checkboxes will appear in the live template.

This is how radio buttons will appear in the live template.

This is how the drop-down options will appear in the template.
Other Custom Fields

Text enables a free text field on the template.

Line Break- Allows for a space between items in the template. This can be used for creating different categories and sections within the template as well as formatting options.

Example: This is what the line break looks in the live template.

Horizontal Rule adds a line in between sections within the template but can also be used for formatting the template for ease of information translation.

This is how the Horizontal Line displays in the live template.

The Heading is a field that allows for a custom title.

This is how the Heading option is displayed in the live template.
Calculations Field

Once your template is completed the Post Wash field will calculate based on the numerical information entered within the live template.


This is how the post-wash field is entered in the live template. Once the numerical data is entered the total motile will start to be calculated.
Completing the Template

From the Semen Analysis builder, once all applicable fields have been selected, click Save to save the custom template.

Once the template is saved, it will live in the Semen Analysis library to the left. Once selected all the field items will display to the right.
Editing Existing Templates/Duplicating Existing Templates

To edit an existing template, select the template to the left and then select the option to Edit this template. The template that was selected will open and allow you to make edits. Once you are finished with the edits, select the Save button to save all new fields.

To duplicate a template, select the template to the left and click Create a new template by duplicating this template. This will duplicate the template. After the duplicate template is created you can edit the template and make all necessary changes. Duplicated templates are often used to create another template that is very similar to a template that you already have but needs a few different items. This way, you do not have to recreate the entire template, just make the few adjustments to the template that you previously made.

Select Delete this template to delete the template from the library.
Please note, as many Andrology Templates as needed for your practice may be created.
Tristan Newman
Comments