Navigation

From the navigational tools, select Accounting.
-
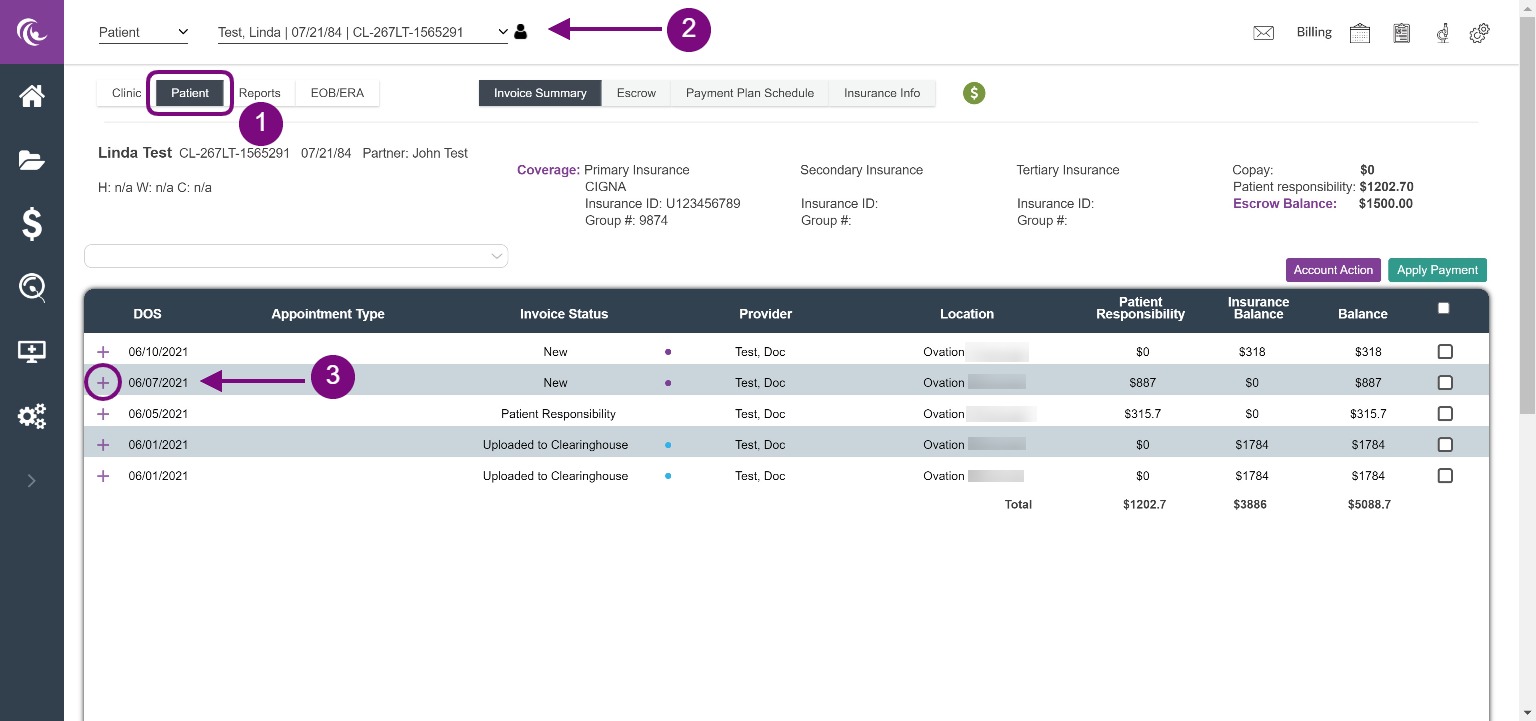
Select the Patient tab. This will default to the Invoice Summary tab.
-
If not already selected, use the search bar to locate the respective patient. Type the patient's name, last name first, and select from the drop down box.
-
Click the plus sign (+) next to the DOS (Date of Service) you wish to reconcile.
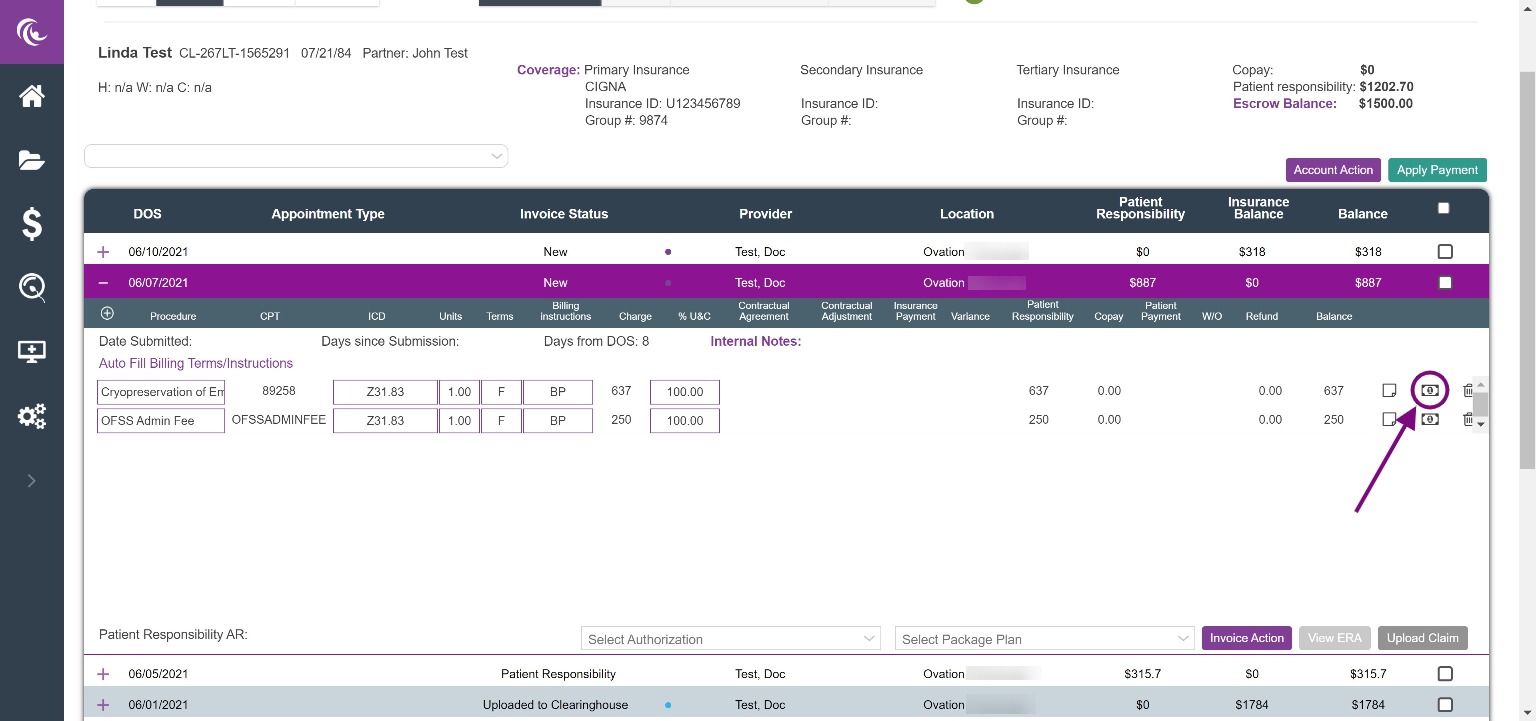
To add a payment to a line item, click the dollar bill icon on the far right of the line.
Entering Payments
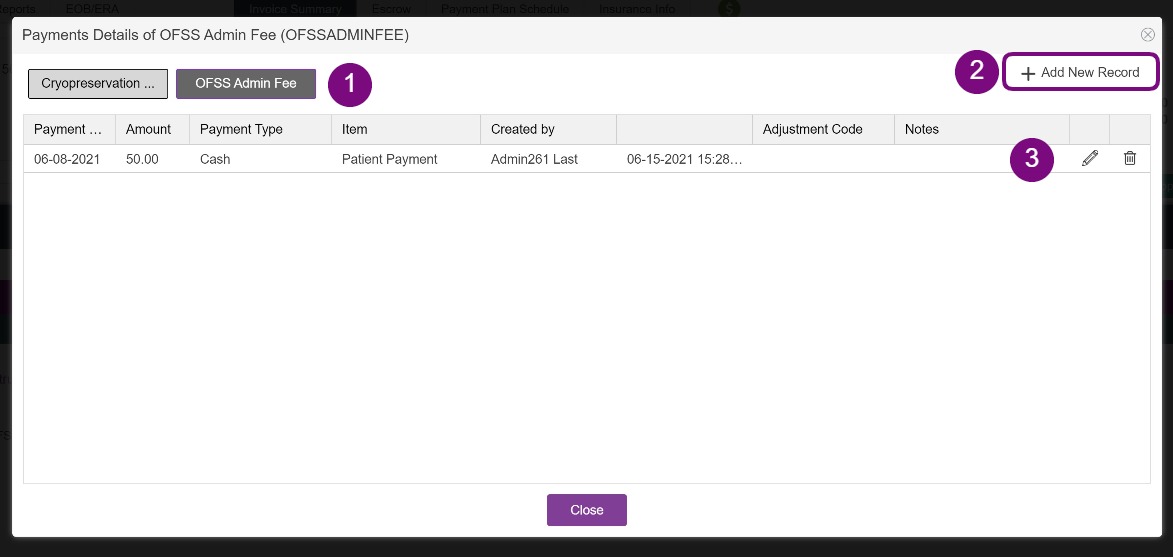
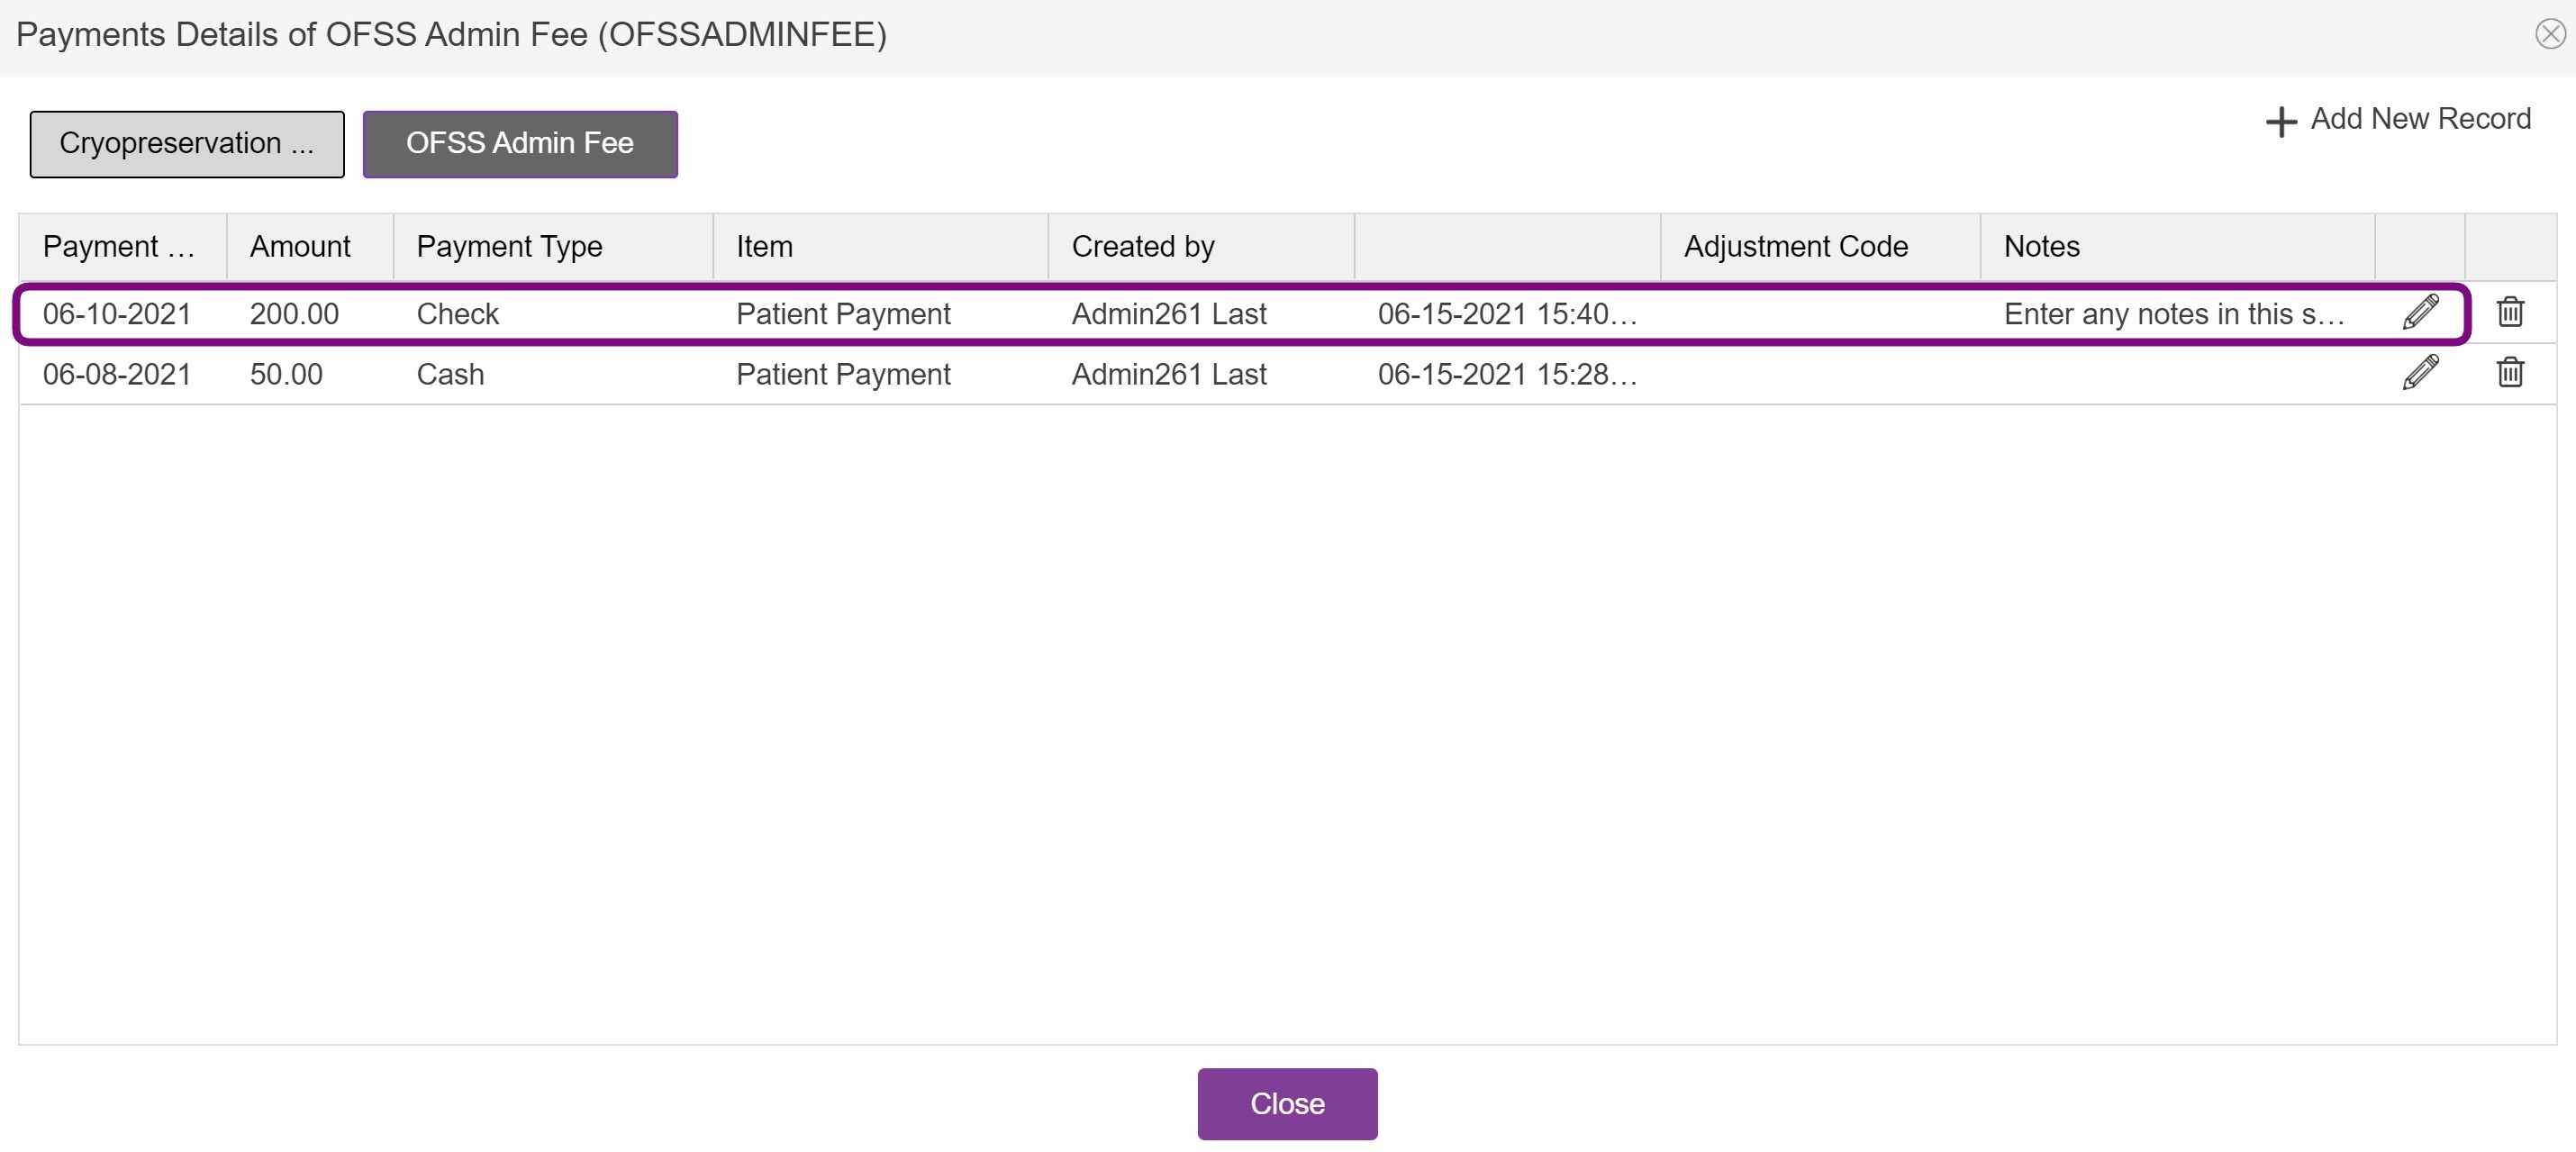
This window allows you to enter payments and see previous payments on a line by line basis.
Each item on the invoice is listed separately, as payments are received per line item inside of Artisan, due to the nature of the way the Clearinghouse processes charges.
1. All line items are listed here. To apply payments, simply click on the item you wish to apply a payment to, clicking on the different icons will switch to that line item. Currently, OFSS Admin Fee, in the dark grey is the item selected.
2. To add a new payment, click the +Add New Record button.
3. To edit or delete an existing payment record, click the pencil or trash can icons, respectively.
Please Note: The ability to edit a record has a 48 hour window. After this time, the trashcan and pencil icons will disappear and the only way to edit will be to create an adjustment
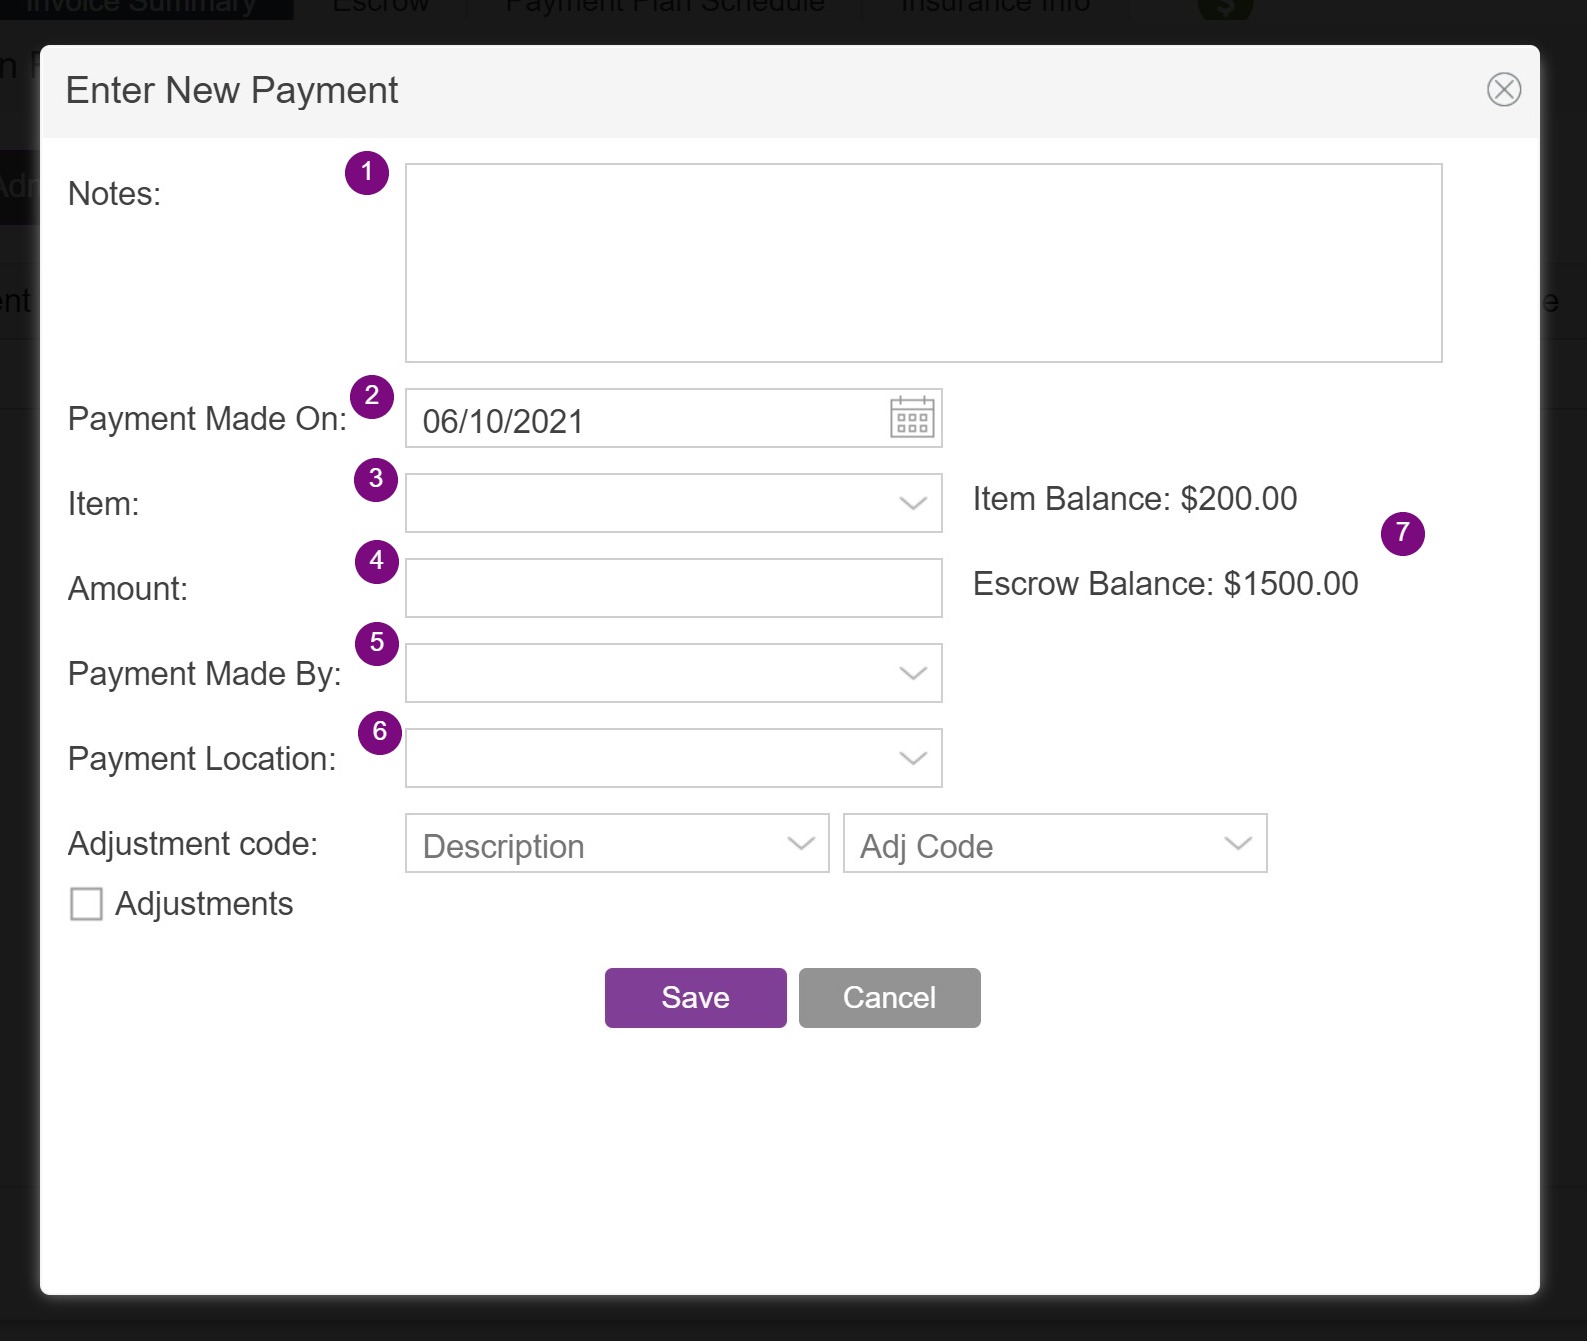
You may make any notes you wish to be associated with the payment you are entering.
- Enter any notes that you want to add to this payment. This is a free-text field.
- Select the date of payment.
- Select the item or type of payment (see below).
- Enter the amount received.
- Select the method of payment (see below).
- Select the payment location.
- Artisan presents to you both the current amount owed for the item you are applying a payment to, as well as the current Escrow Balance for the patient. (To learn more about Escrow click here.).
Type of Payment
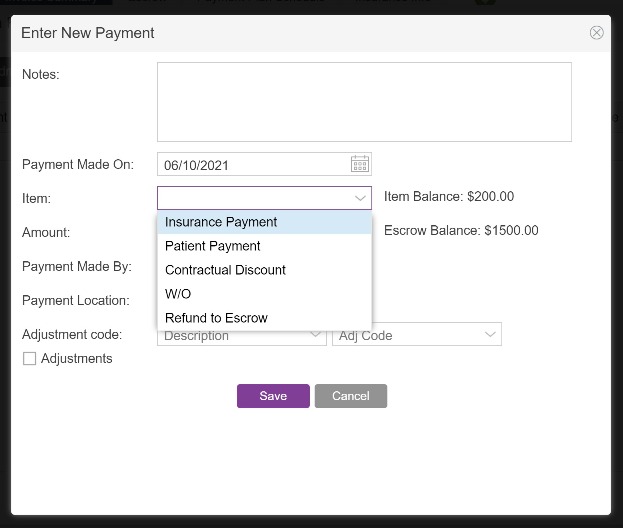
Select the item or type of payment: this will allow the payment to appear in the correct column. Use this for all actions/interactions with the DOS.
Method of Payment
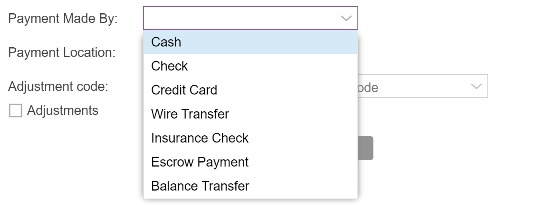
Select the method of payment here, this option will also allow you to make a payment from the Escrow Account, if there is an Escrow Balance.
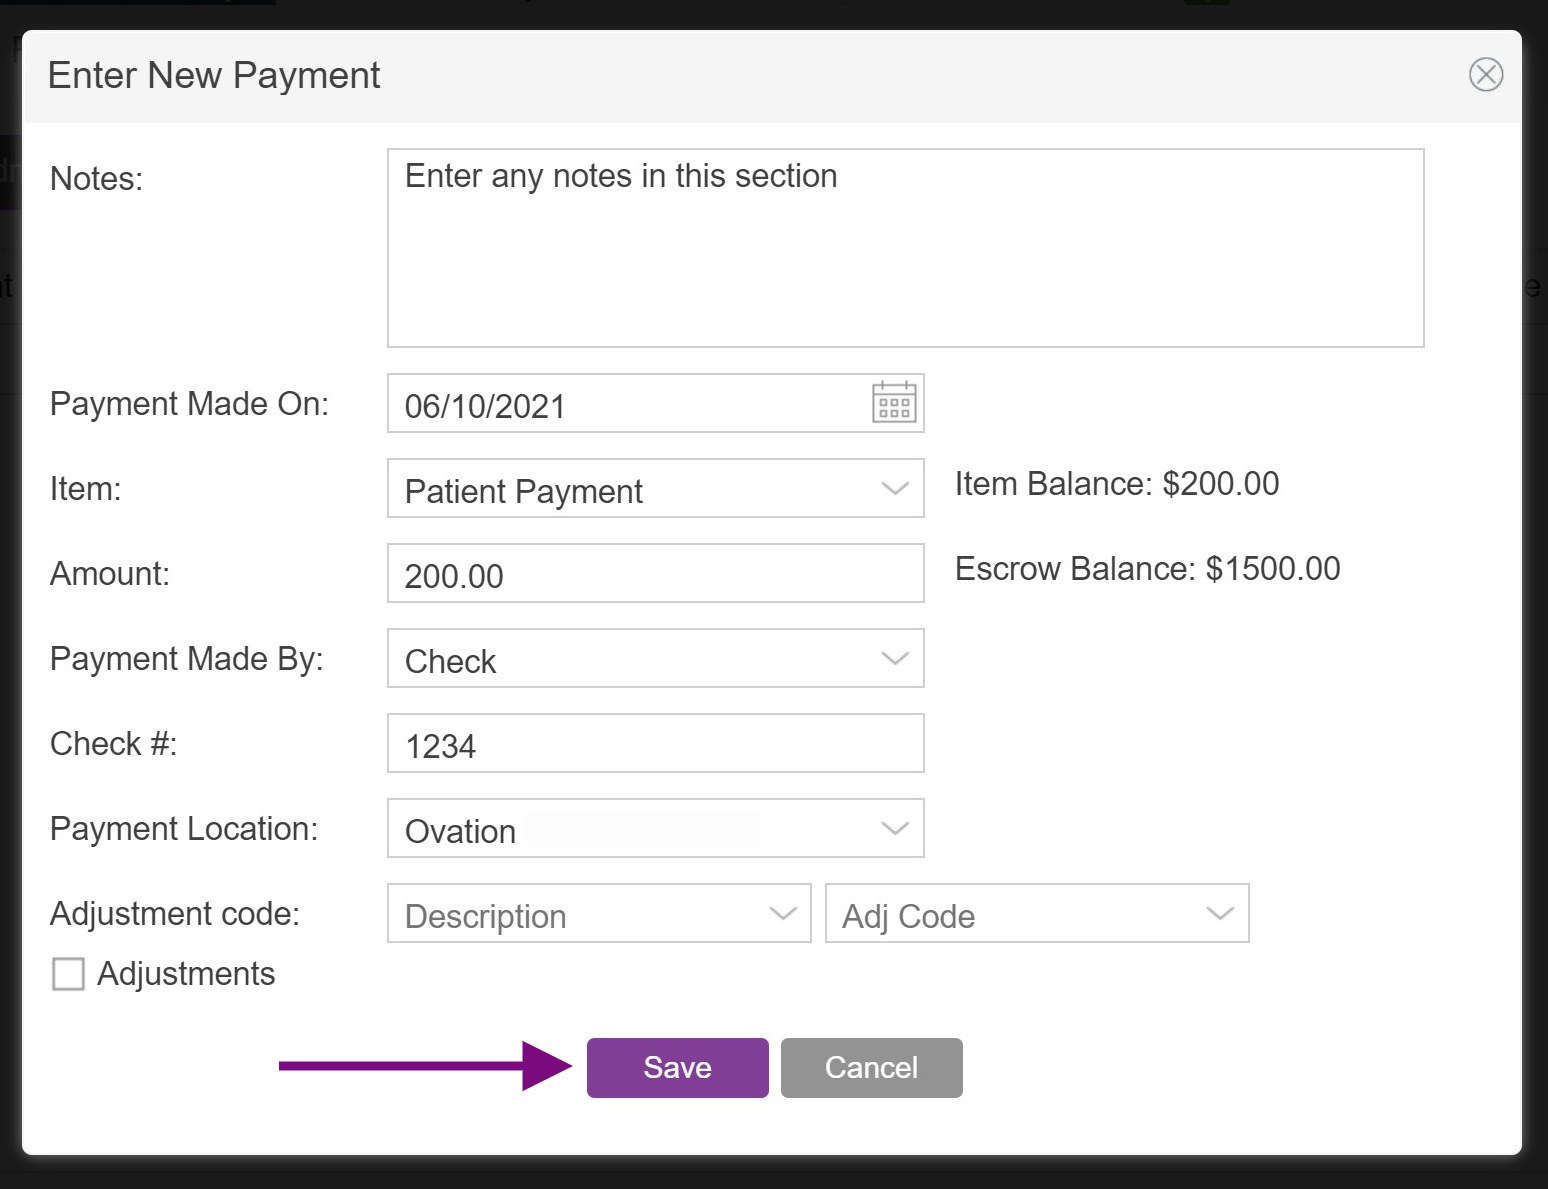
Click Save to commit the entry.
The payment is now applied and recorded.
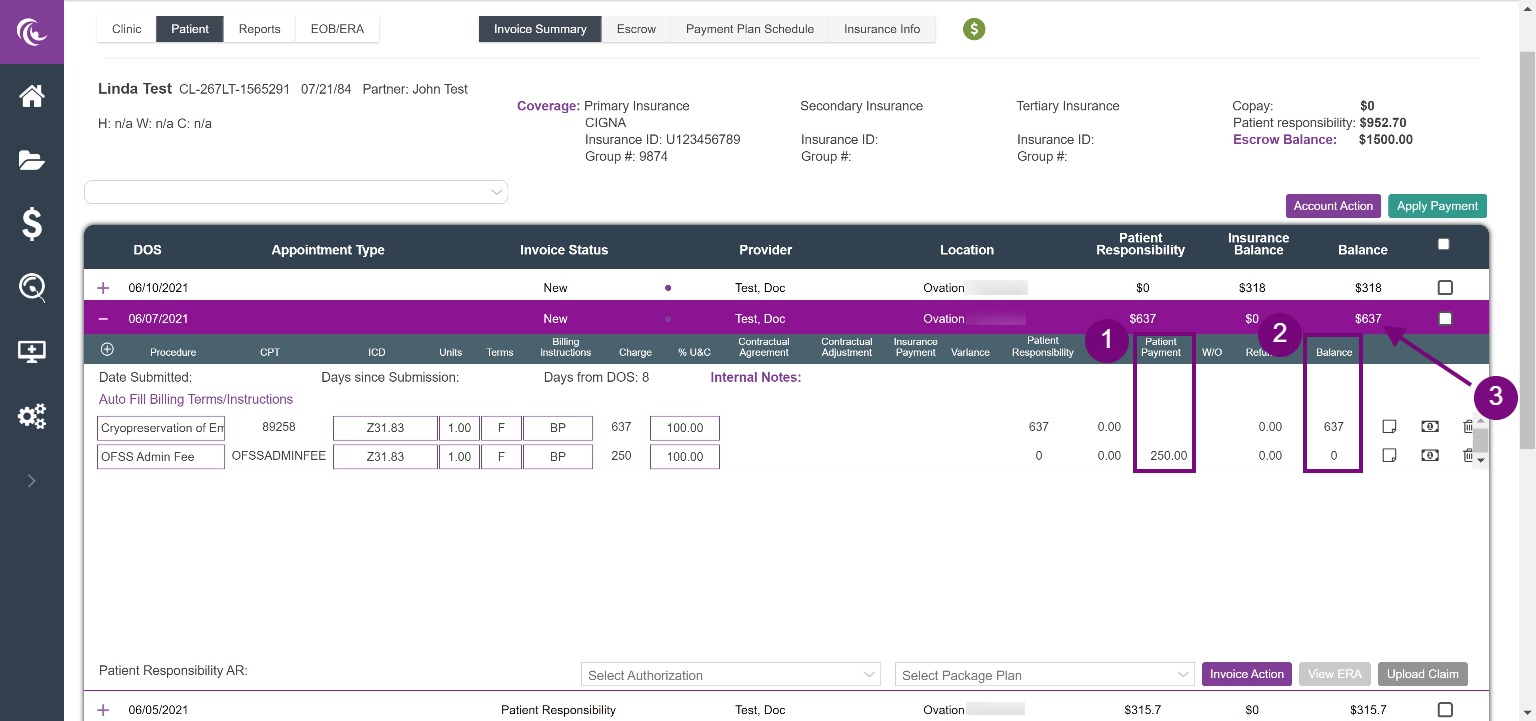
In the Invoice Summary tab, we can see the payment has been applied to the correct line item under:
1. Patient Payment and that the
2. The balance for each line item has been updated, also updating the
3. The total balance for the date of service is also listed under the Balance column in the line item.
Making an Adjustment
Adjustments are used to make corrections to balances in the system. The most common use for an adjustment is applying a military discount to a date of service.
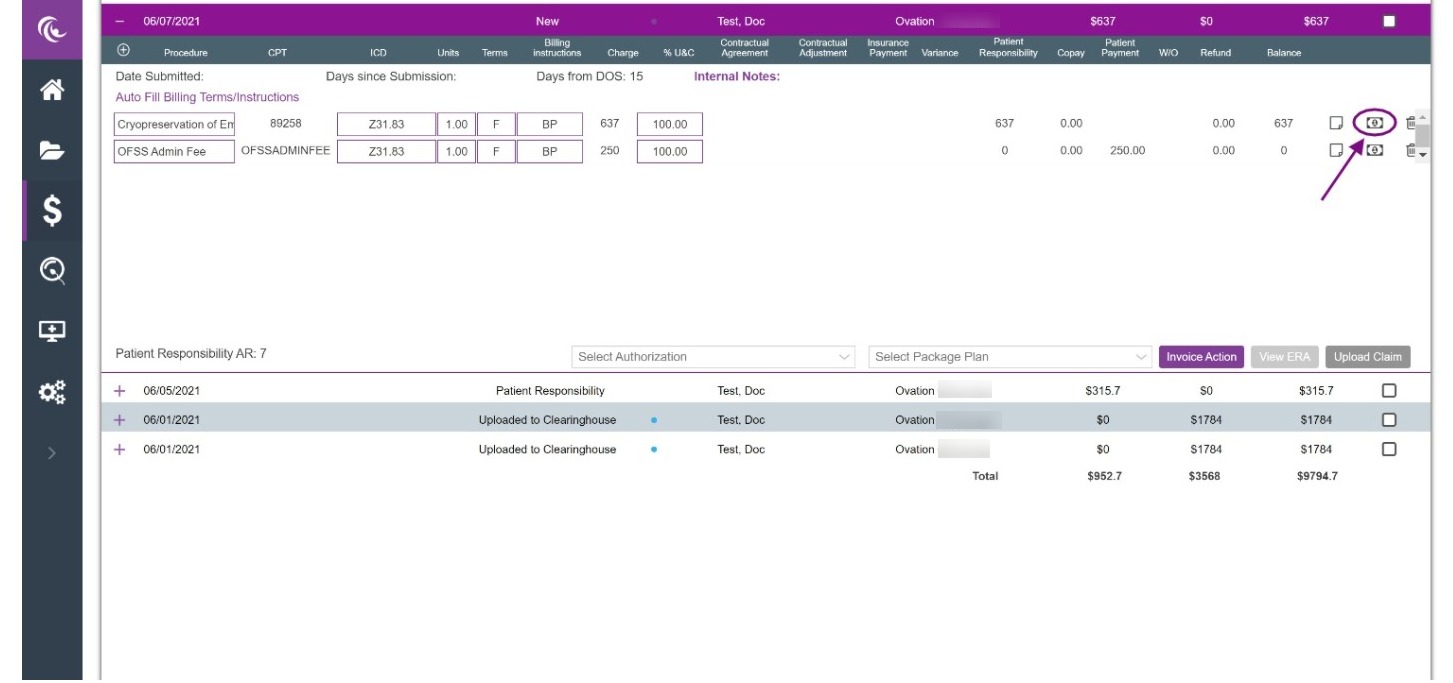
To make an adjustment, click on the Dollar bill icon to the right of the line item.
In this example, the patient is to receive a 20% military discount off of the cryopreservation of embryos.
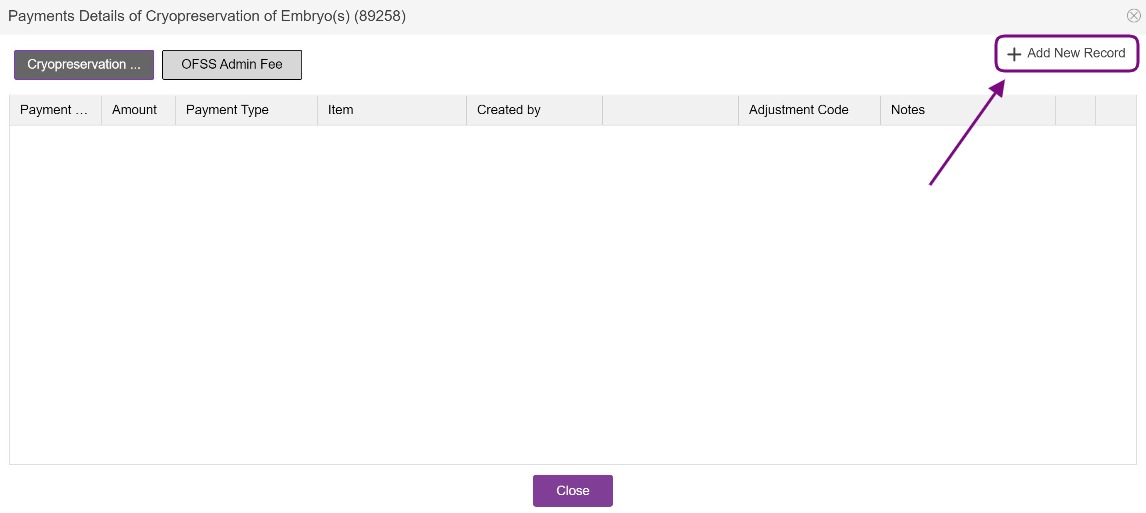
Click on +Add New Record.
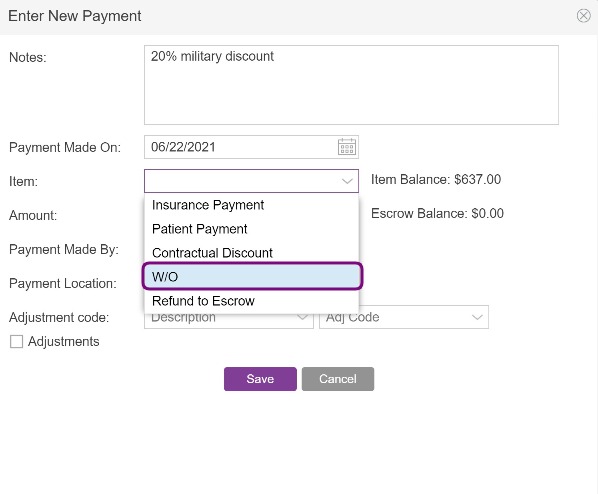
Notes: Enter any information into the Notes section.
Payment Made On: Select the date the adjustment is being added to the account.
Item: Select W/O from the dropdown box since we are writing off money for the adjustment.
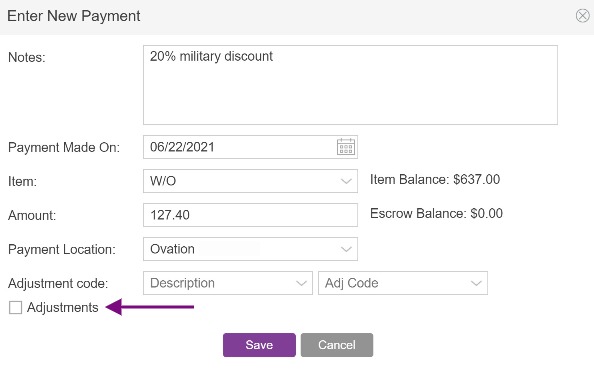
Amount: Enter the amount you are adjusting.
Payment Location: select your location from the dropdown box.
Click the Adjustments box to switch from a payment to an adjustment.
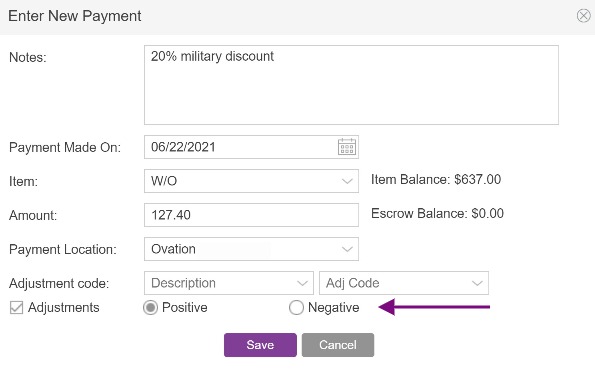
Select the type of adjustment.
- Use the positive option to add money to this column.
- Use the negative option to take money from this column.
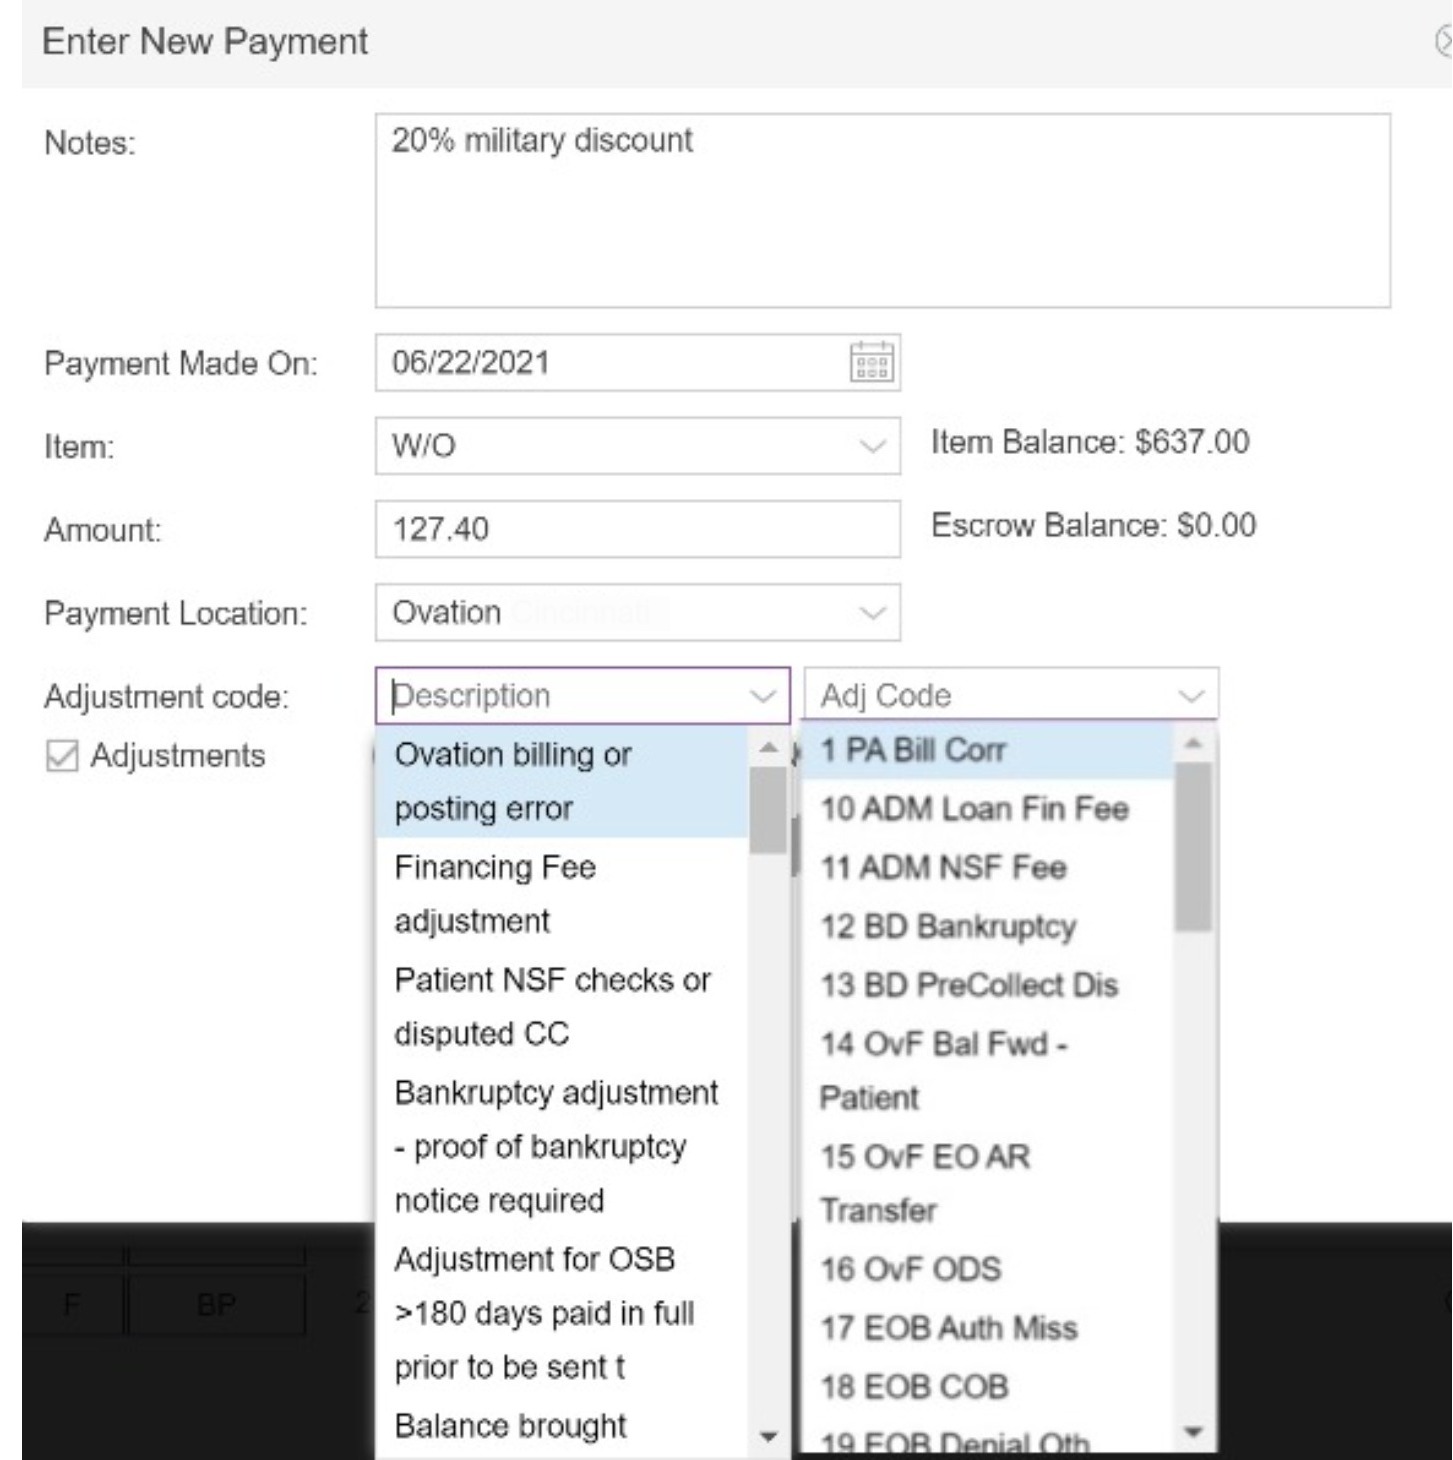
Select either the description of the adjustment or the adjustment code from the dropdown.
Click Save to apply your adjustment.
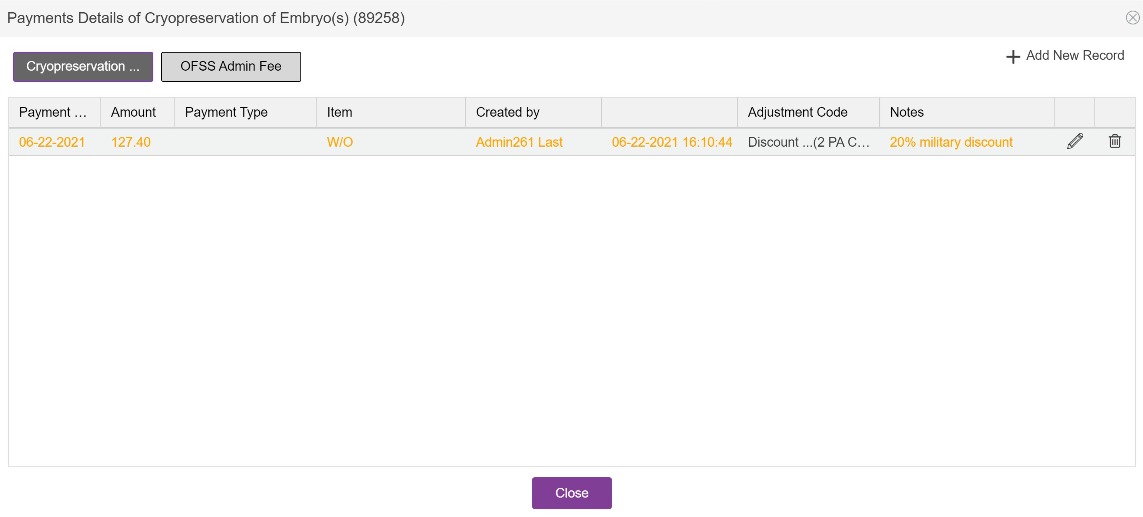
Our adjustment now appears in the list of payments in orange. All adjustments are colored orange.

In the Invoice Summary tab, we can now see that the Patient Responsibility column as been reduced by 20% and the W/O column reflects the $127.40 adjustment.
**All manuals are compliant with HIPPA regulations. No patient information has been released. All screenshots above were taken from a test clinic with fake patient information.
Heather Yatsko
Comments